Introduction #
this Section’s purpose is to take you through the process of building a Pizza Delivery App.
the backend will serve multiple clients:
- the management – used by management
- managing branches
- managing toppings
- the user app – used by customer to order pizza
- allows creating a new order
- adding multiple pizzas
- adding toppings for a pizza
- pay via PayPal
- track delivery location live using WebSocket
- the delivery app – used by delivery to report location
- push GPS location
the example is available on wizzdi cloud public marketplace
App Overview #

Domain Model #
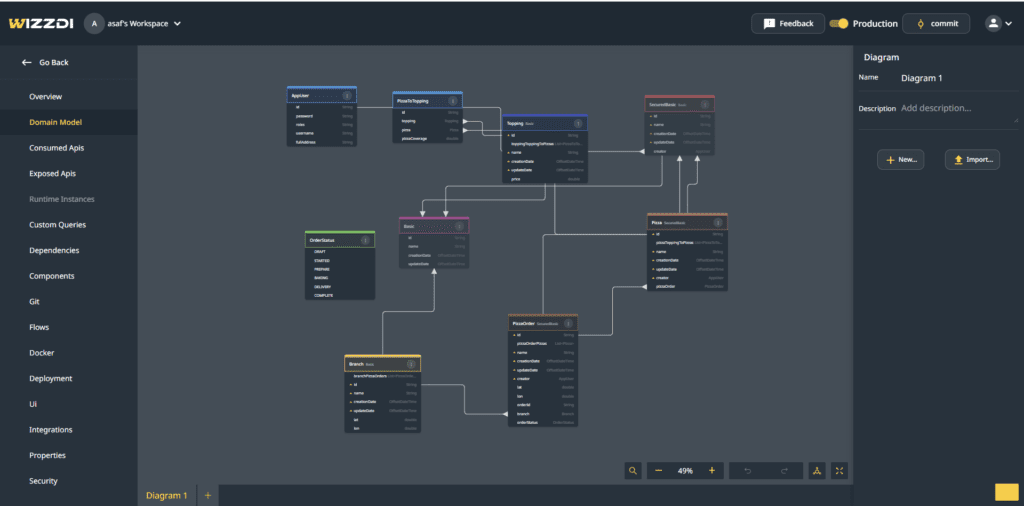
in this part we will create the domain model to describe the normal data that is handled in a typical Pizza Restaurant: Basic,SecuredBasic,Branch,Topping,PizzaOrder,OrderStatus,Pizza,PizzaToTopping
the Domain Model Editor is a powerful tool that allows creating connection between entities ,setting indexes , creating inheritance relationship and much more.
for a more extensive view of the Domain Model Editor check its documentation.
The Basic Entity #
The Basic Entity will be used as a Mapped Super Class for all other Entities , a Mapped Super Class is kind of a Mold for SecuredBasic, Branch and Topping, this allows us to have the name ,id , creationDate, updateDate of Basic in all the other Entities.
The SecuredBasic Entity #
The SecuredBasic Entity will be used as a Mapped Super Class for all other Entities , this allows us to have the all the fields of Basic Entity as well as the creator field which will hold the creator of the things the customers create , this will automatically filter the data so users only see their own data (except admin users).
The Branch Entity #
The Branch Entity defines a Branch of our Pizza Restaurant chain, a pizza order will be made at a specific branch
The Topping Entity #
The Topping Entity defines the possible toppings our Pizza Restaurant chain provides and their price.
The PizzaOrder Entity #
The PizzaOrder Entity will be used to represent a new Pizza Order
The OrderStatus Enum #
the OrderStatus Enum is a list of predefined values that will represent the possible Status values a Pizza Order Goes through
The Pizza Entity #
The Pizza Entity will be used to represent a Pizza in a Pizza Order , we can have many pizzas in a single pizza order
The PizzaToTopping Entity #
The PizzaToTopping Entity will be used to represent a Topping on a Pizza , the user will be able to select the toppingCoverage , a pizza may have many toppings.
Exposed APIs #
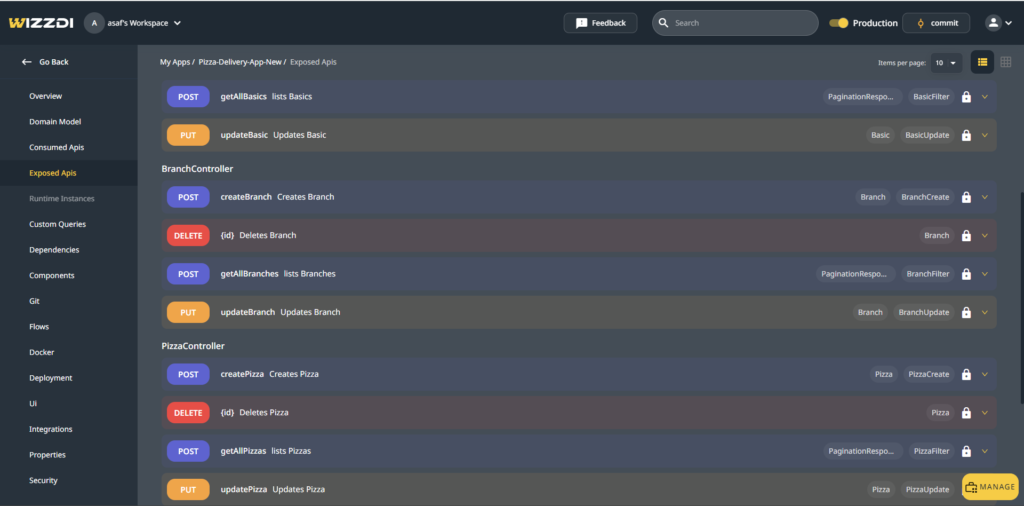
In this section we can see the automatically CRUD (create, read, update and Delete) APIs.
more options available here such as adding a new custom endpoint , defining if the project is a contract-first of domain-first and much more.
check the Exposed API Documentation for an extensive view of it.
Custom APIs #
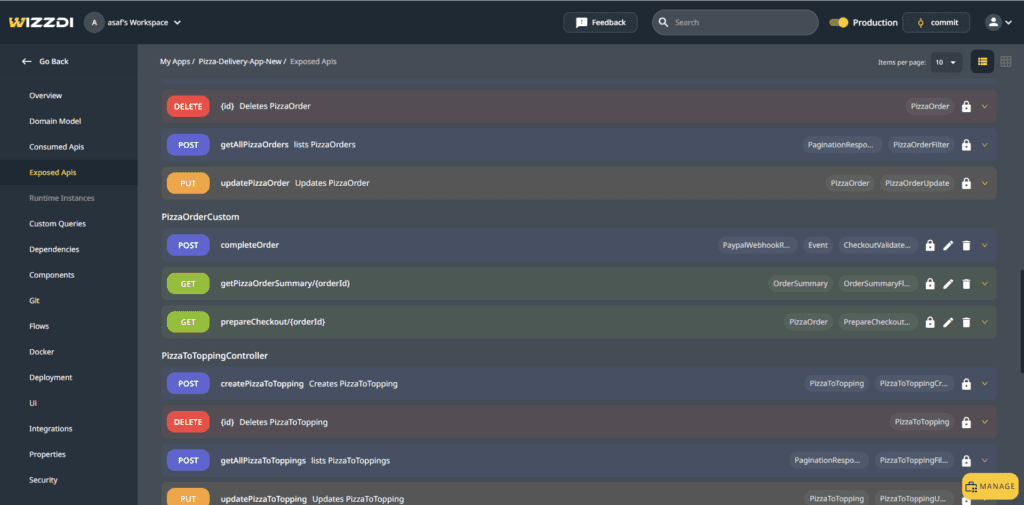
we have added three APIs in addition to the automatically created CRUD apis;
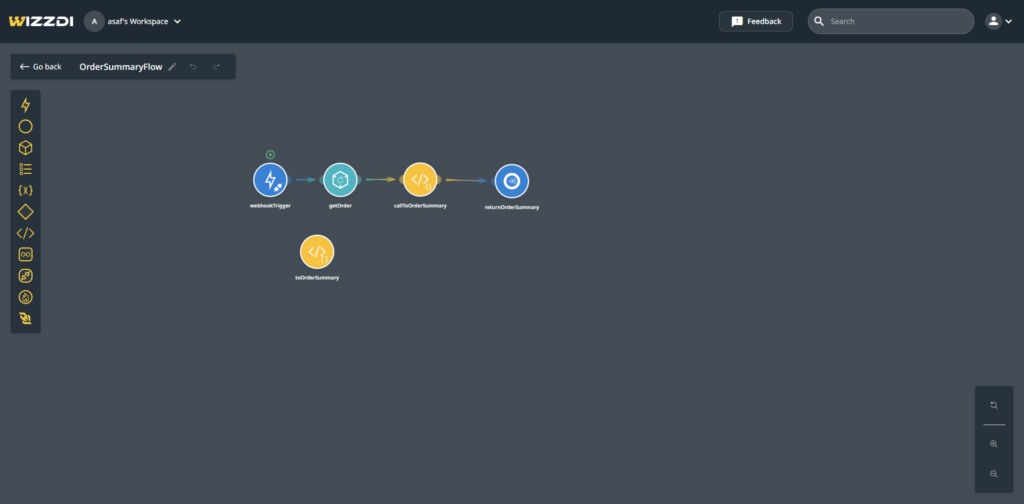
- getPizzaOrerSummary – given a PizzaOrder id will return a summary of the order , we will use this to display a summary of the order before paying , it is connected to the OrderSummayFlow(more on flows later)
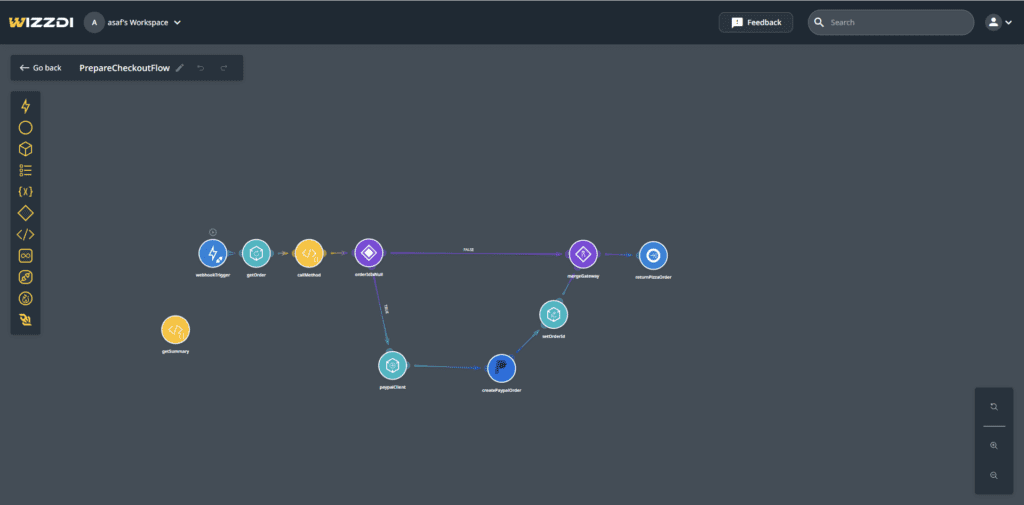
- prepareCheckout – given a pizza order id we will start the checkout process with PayPal , it is connected to the PrepareCheckoutFlow
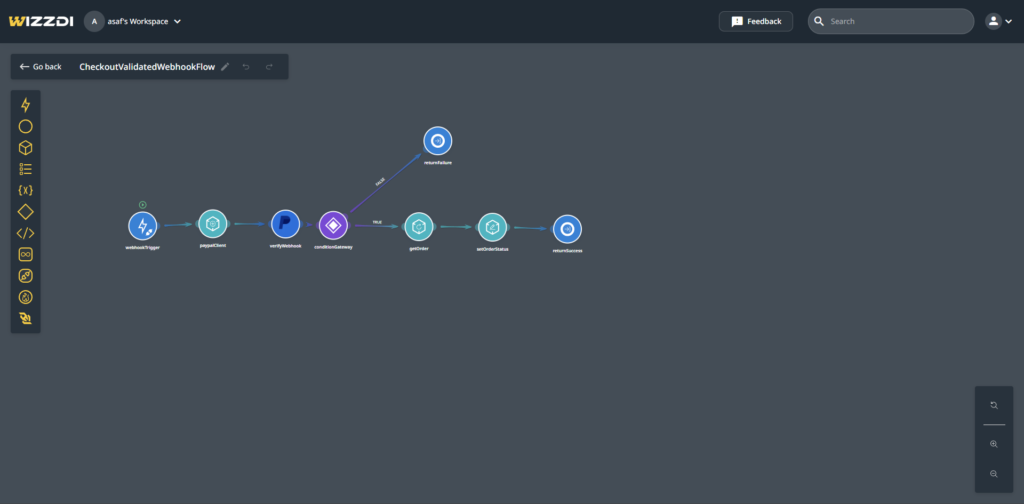
- completeOrder – this will be called by PayPal when the order is paid for , providing a PayPal order id we will mark the order as paid and change the PizzaOrder Status , it is connected to the CheckoutValidationWebhookFlow
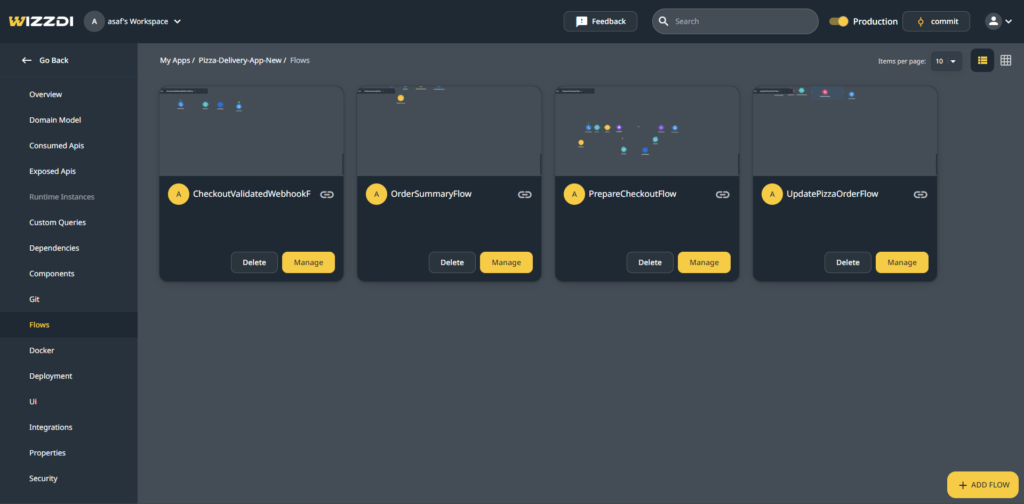
Flows #
business flows are used to express a custom business logic connected to custom APIs or other type of triggers (schedule ,event and more) ,
check the Flows Documentation for an extensive view of it.
OrderSummaryFlow #
the order summary flow is using a Method Definition activity which is written in Java
PrepareCheckoutFlow #
the PrepareCheckoutFlow will be called when the user tries to pay for an Order , it :
- fetches the order based on the incoming id
- gets the order summary by calling the getSummary method definition (which calls the logic from OrderSummaryFlow)
- if a PayPal order id is not set on this order
- calls PayPal api with the total that should be paid and the order id
- takes PayPal order id from the response and sets it on the order
- returns the order
CheckoutValidationWebhookFlow #
the CheckoutValidationWebhookFlow will be called by PayPal (the url of this API should be set as a webhook in PayPal) when the user successfully paid for an Order , it :
- calls the PayPal api to verify the webhook call ( this prevents anyone from simply calling this webhook and impersonate payapl)
- if it was not validated – return failure
- fetches the order
- updates the order status to STARTED
- return success
UpdatePizzaOrderFlow #
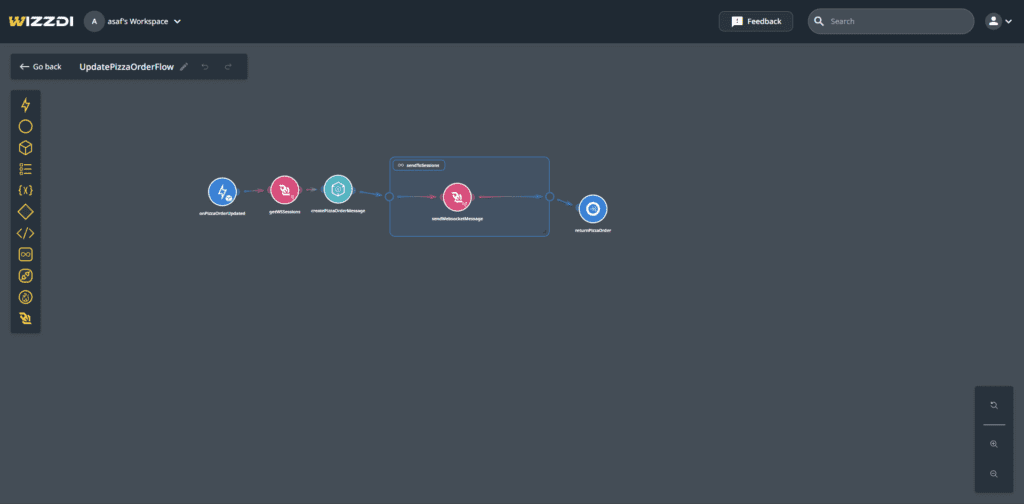
the UpdatePizzaOrderFlow will be trigger when a PizzaOrder is updated (it is triggered by an event), it will push update message of the order status to WebSocket (more on Websocket integration later), this will allow us to update the customer without constantly calling an api to refresh the data , it :
- fetches all the websocket sessions that listen to the changed pizza order id
- creates an update message that will be sent to all of them
- for every session it sends the message
Integrations #
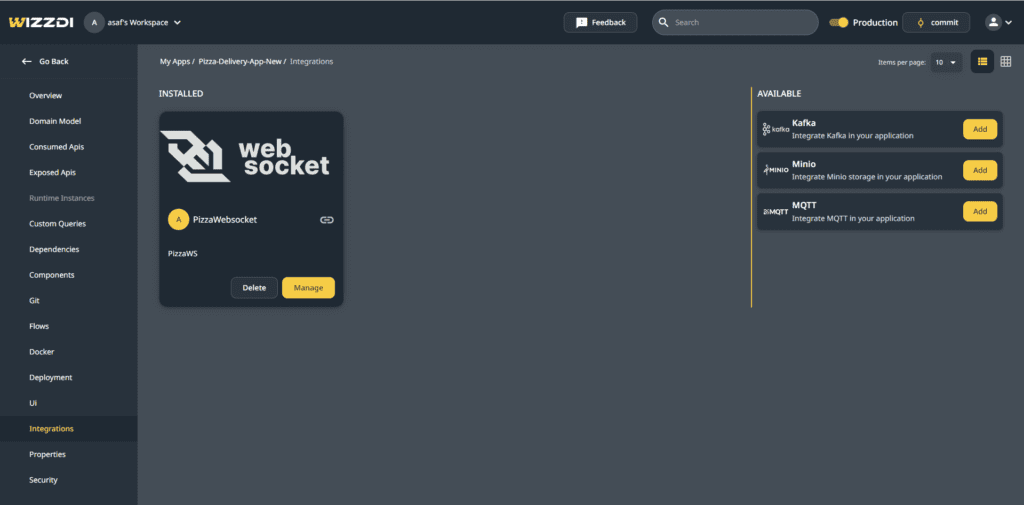
Integrations allow adding additional services to our deployed app , it also adds relevant integration code to the app and adds additional activities to the activities toolbar .
check the Integration Documentation for an extensive view of it.
in this application we will be using only one integration – the websocket integration.
Web Socket Integration #
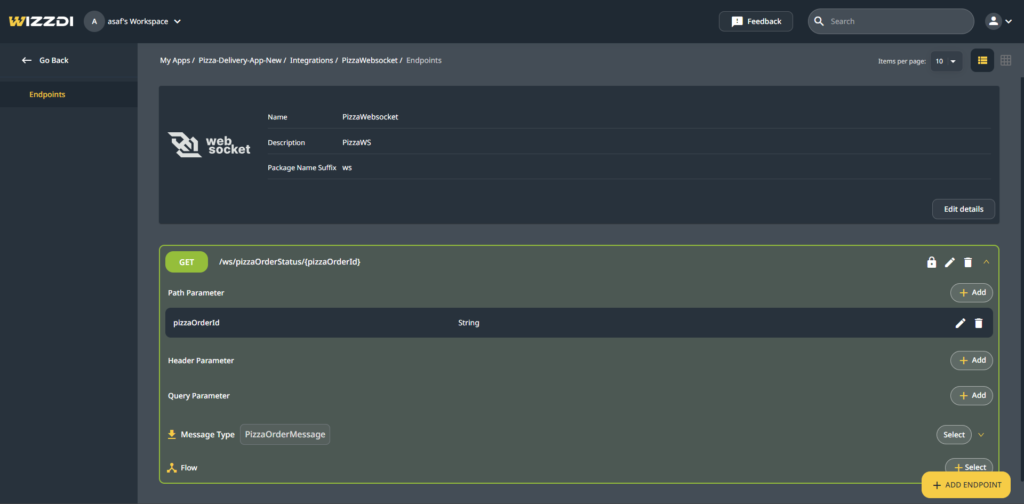
we are using the websocket integration in our UpdatePizzaOrderFlow, here we define the url of the websocket endpoint (we can have multiple endpoints) , and the message structure that will be used in our websocket endpoint.
Security #
since we have multiple users for our backend it is important that we allow each user to execute only the actions it allowed to do.
additionally we also like to support SSO login and registration.
SSO Login #
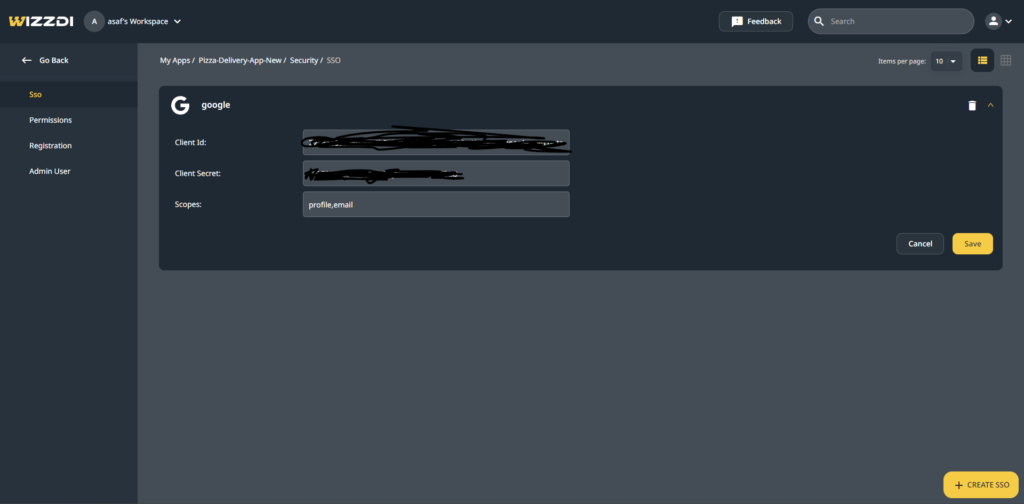
in the sso login area we can define support for sso login /registration , wizzdi cloud support many of the known providers as well as the option to add a custom provider.
check the SSO Login Documentation for an extensive view of it.
Permissions #
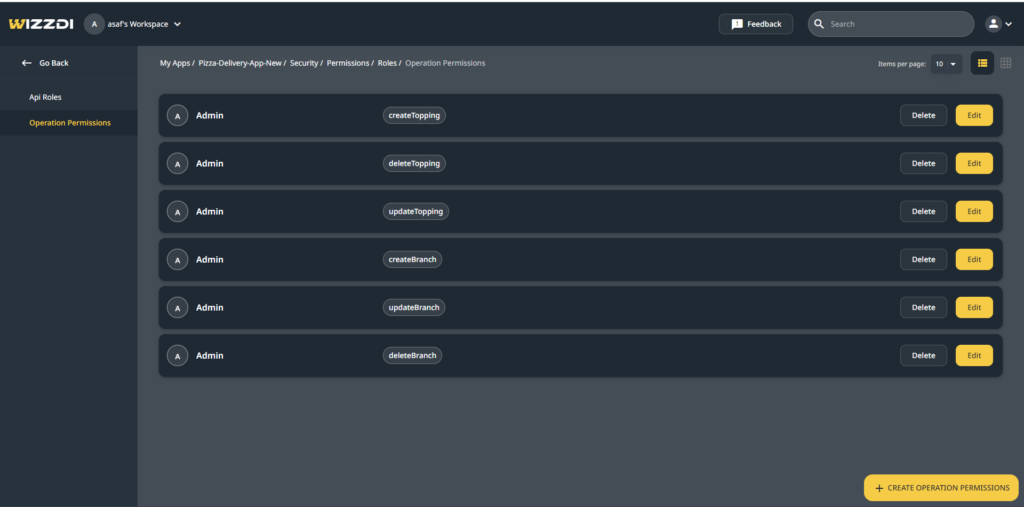
in the permissions area we set which roles are allowed to which permissions (this can be done from this screen or from the exposed apis screen by pressing the lock icon next to the api endpoint).
since Branch and Toppings should not be added by normal app users we will allow only admin to manage them.
check the Permissions Documentation for an extensive view of it.
Properties #
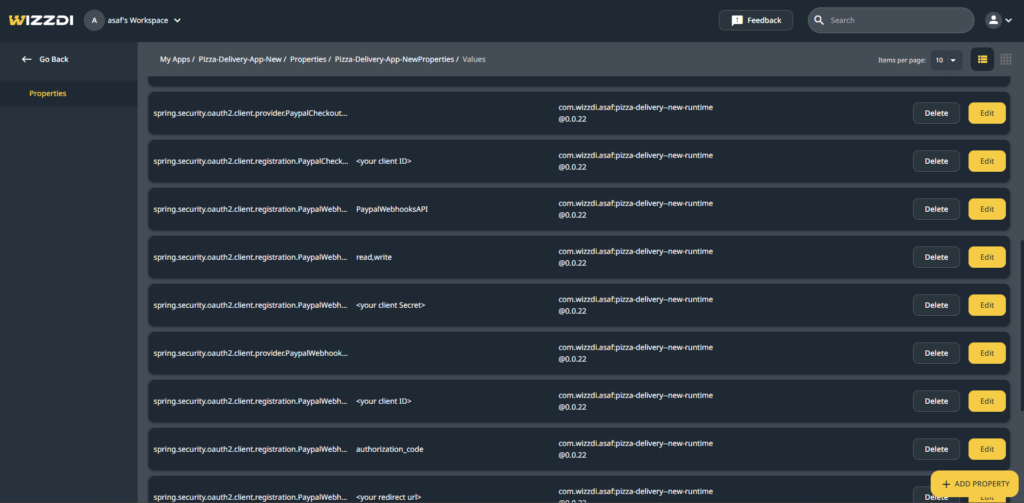
finally we need to set some properties to make PayPal SSO Clients work :
- SSO Clients details , this will require PayPal client and secret
- SSO Clients scope – https://api.paypal.com/v1/payments/.*
- SSO Clients token URI – https://api-m.sandbox.paypal.com/v1/oauth2/token
- SSO Clients authorization URI – https://api-m.sandbox.paypal.com/signin/authorize
Review #
Review The Code. #
now the code is available , this example code can be found here.
Review The App’s API Docs #
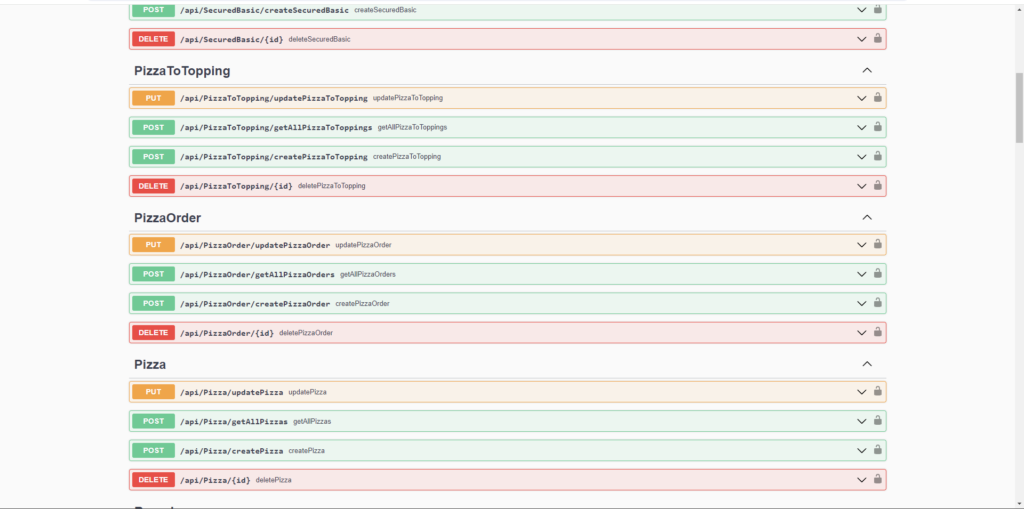
The swagger docs for the app is available here.
