Introduction #
Consumed APIs refer to the specific definitions of external services offered by vendors such as Google, SendGrid, and WhatsApp. These APIs enable the integration and access of their services directly from your applications. Additionally, consumed APIs facilitate the interconnection of various applications on the Wizzdi cloud, utilizing the principles of Service-Oriented Architecture (SOA).
Consumed APIs can be used to:
- Broaden Functional Scope: By integrating with external services, your app can extend its capabilities without building every feature from scratch.
- Streamline Processes: Utilizing pre-existing and well-established services like SendGrid ensures that specific processes, such as email delivery, are handled efficiently.
How to #
Consumed APIs can be defined in two ways:
- OpenAPI Import: Most service providers provide definitions of OpenAPI (previously known as Swagger). These documents present a structured explanation of each of the API’s endpoints, responses, request formats, and other essential details. Wizzdi Cloud streamlines the import process of these files, automating the setup of the used API endpoints. This helps save time and guarantees that your backend conforms to the recommended standards and constructions of the external service.
- Manual Definition: If an OpenAPI file is unavailable, Wizzdi Cloud allows you to manually set up and define the consumed API endpoints. This must be done to match the documentation of the said API accurately.
The Consumed APIs section in Wizzdi Cloud serves as a bridge, connecting your backend to the broader ecosystem of web services. Whether you plug in manually or import an OpenAPI specification, this integration ensures your application remains versatile, dynamic, and capable of leveraging the best of what the digital world offers.
API endpoints are specific URLs that software clients (web apps, mobile apps, other systems) use to request specific actions or data. Think of them like particular addresses within a city (the API), where each address offers a different service or information. They are usually accessed using methods like “GET” (retrieve data) or “POST” (submit data and receive data).
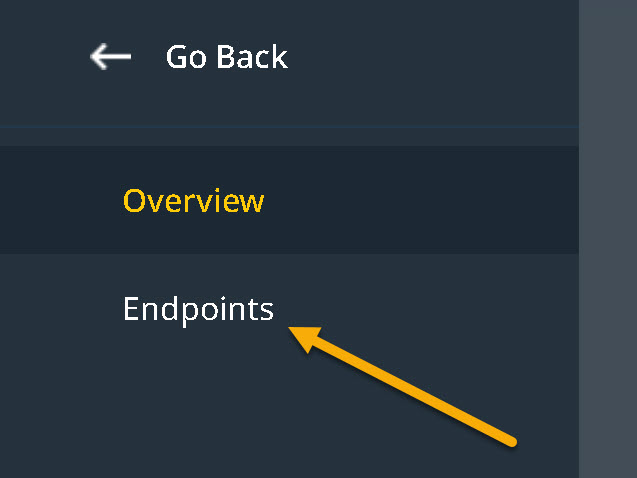
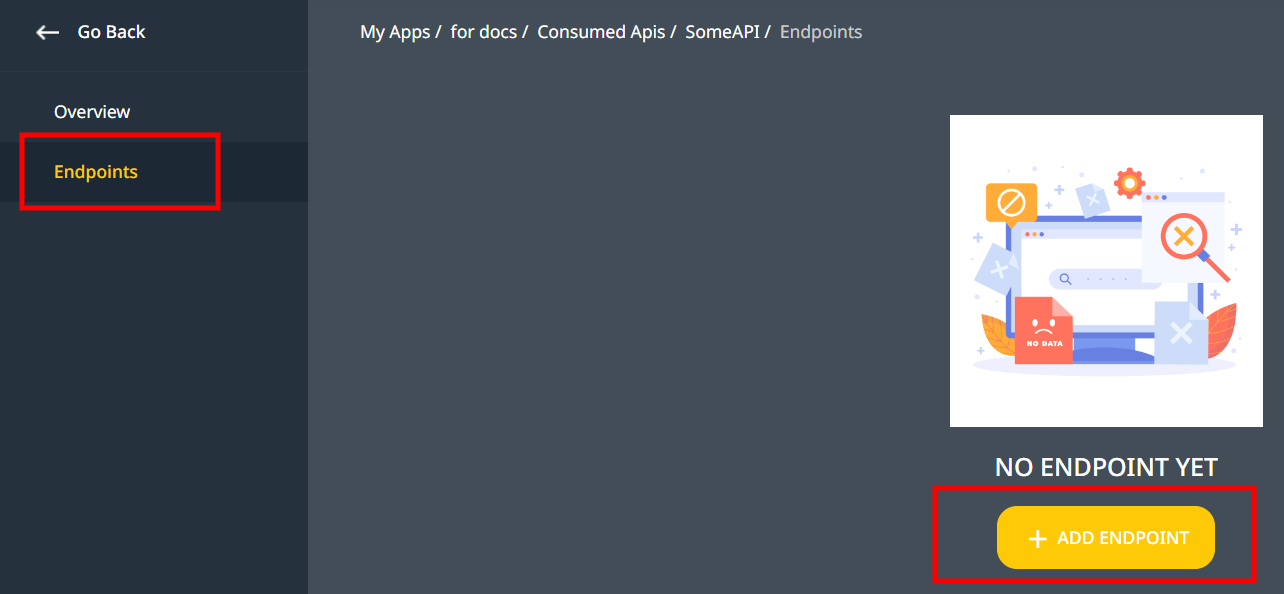
Click on EndPoints To Access the API endpoints.
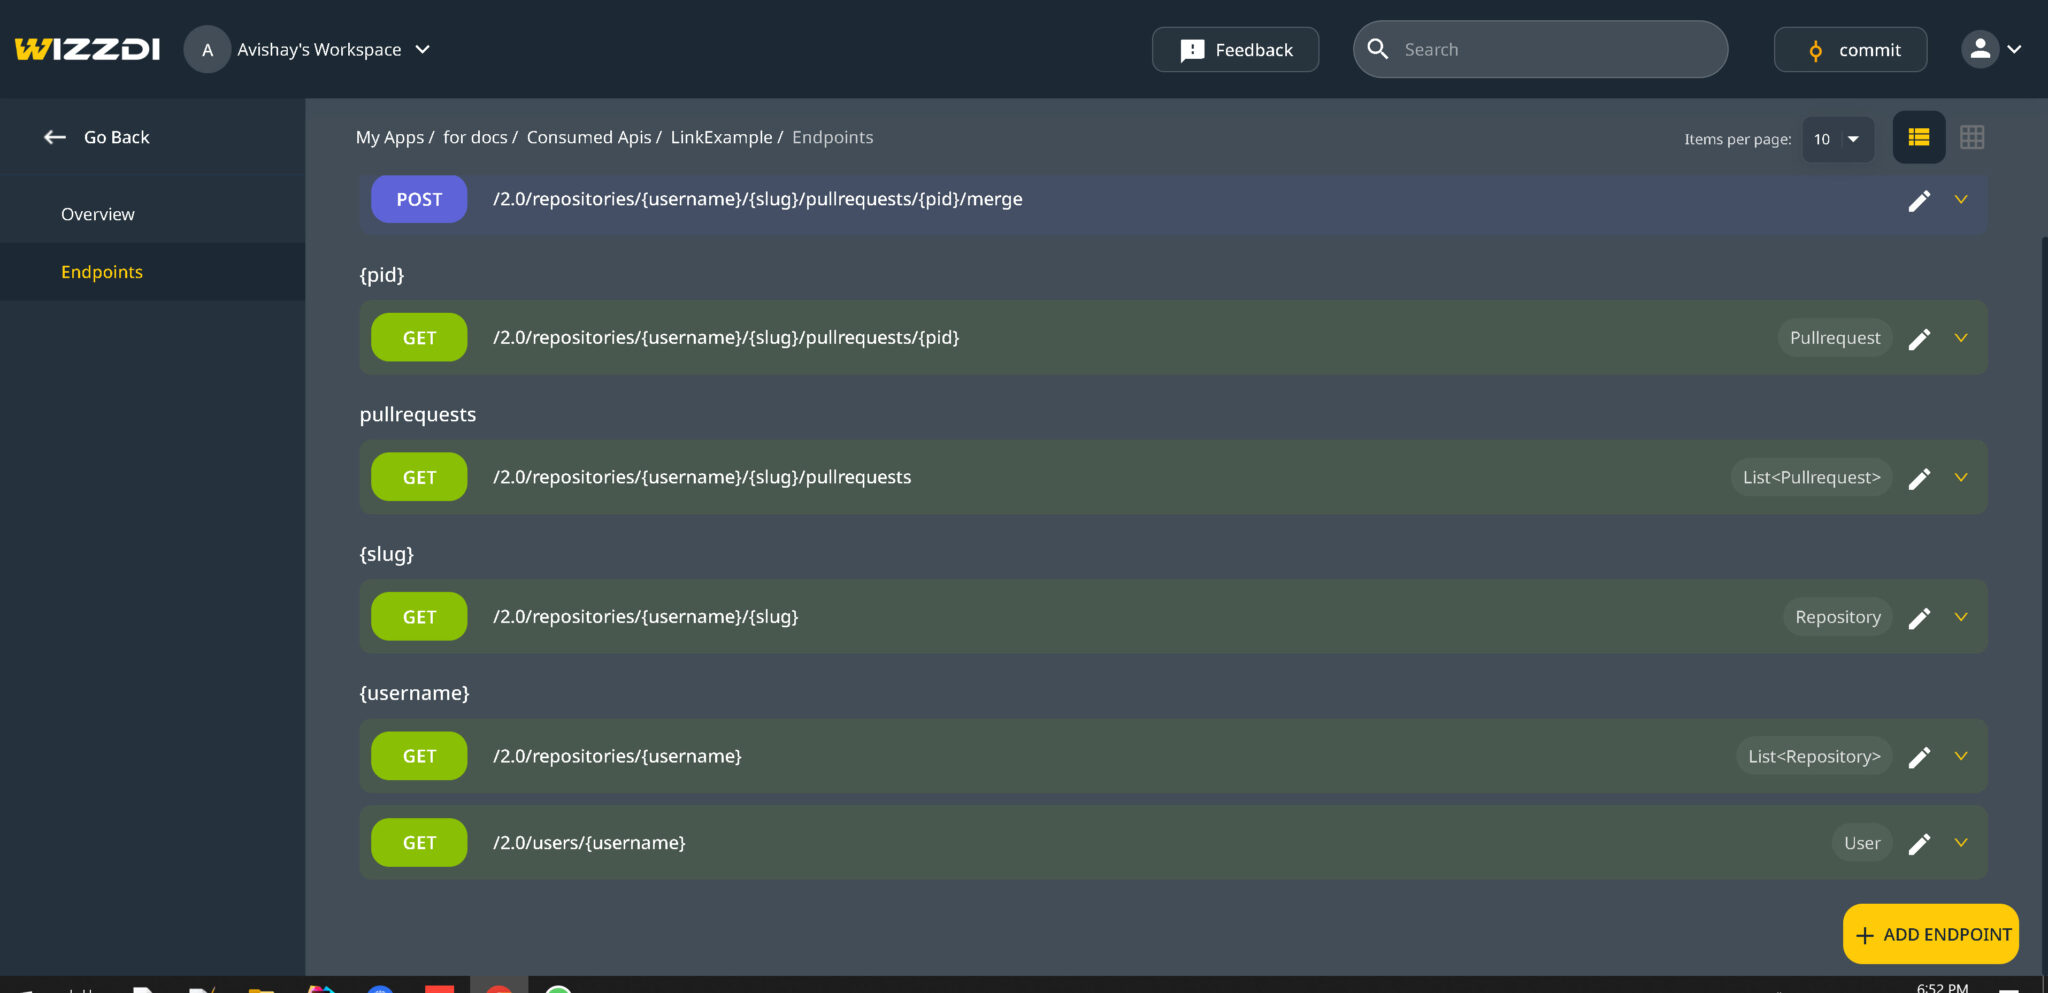
You should see a screen similar to this one:
Refraining from modifying imported APIs is crucial, as it represents a binding agreement between the provider and any system using their services.
Manual definition #
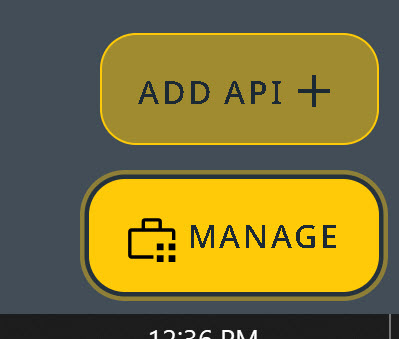
Click the ‘ADD API +’ button to add an API manually.
The new API dialog appears.
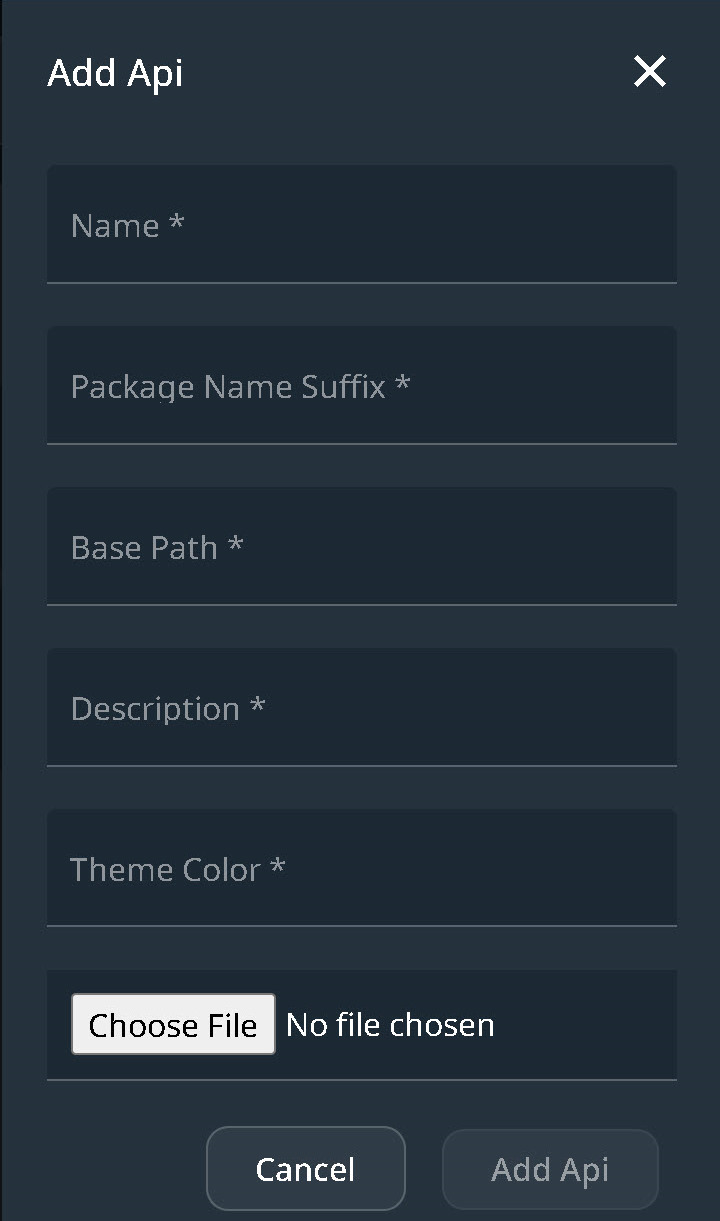
Update the following mandatory fields:
- Name: The name should start with a capital letter.
- Package Name Suffix: This should be the suffix used for the package of this API and can be any valid part of a Java package name, such as the API name.
- Base Path: The API owner must provide the base path, which cannot be modified arbitrarily. For instance, the base path for Apps in the Wizzdi Customers’ cluster is:
- https://[app-name].[user].[workspace-name].cluster.wizzdi.com/
- Description: Describes the API. This field is mandatory and cannot be left blank.
- Theme Color: Select a color for the API icon. This field cannot be left empty.
Endpoints #
Select the endpoints menu option and then click on Add Endpoint:
Once you click on +ADD ENDPOINT, a dialog similar to this appears:
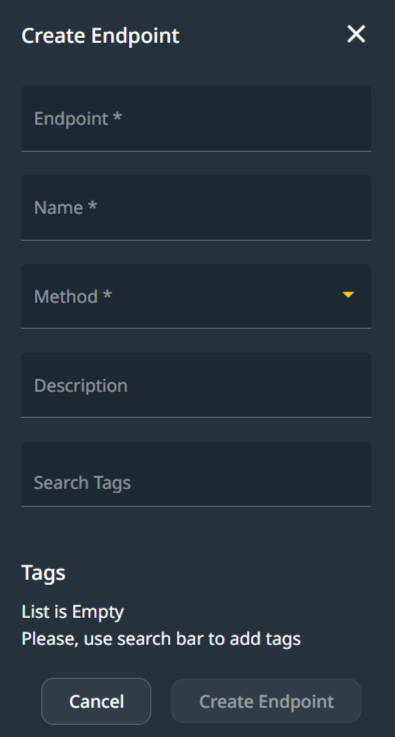
Endpoint Fields
#
Endpoint: this is the unique definition of the ‘address’ of the endpoint, for example,/api/ActiveOnCall/createActiveOnCall
When defining an external service’s endpoints, the definition must match the external service behavior.
Name: This is the name assigned to the endpoint method. It must start with a non-capital letter and conform to Java method naming conventions.
Method: Select one of the available options matching the required method as documented in the external (consumed) API. See here.
Description: This is for internal documentation of the endpoint.
Tags: Endpoints within an API can be categorized using multiple labels known as tags. Generally, a tag represents a collection of APIs with a common theme or function. An endpoint may be associated with several tags, facilitating better organization and more straightforward navigation of related API functions. When adding a tag to an endpoint, you can use an existing tag or add a new one. Tags are case-insensitive.
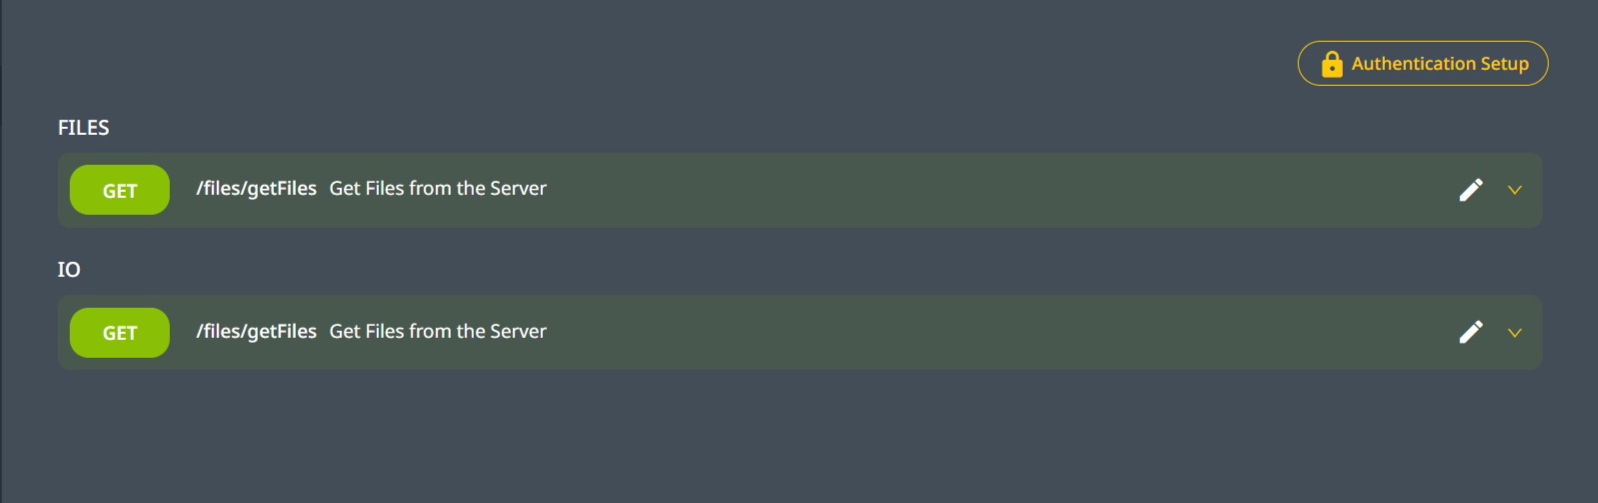
When the App runs, regardless of location, the Swagger interface can access the API; below is a sample screen capture of the Swagger interface of a set of endpoints under a single tag, WeeklyTime.

Endpoint Management #
An endpoint is displayed under all of the associated tags in a similar way to Swagger:
Use the pencil icon to edit the fields above or click on the arrow down ![]() to define other properties of the endpoint.
to define other properties of the endpoint.
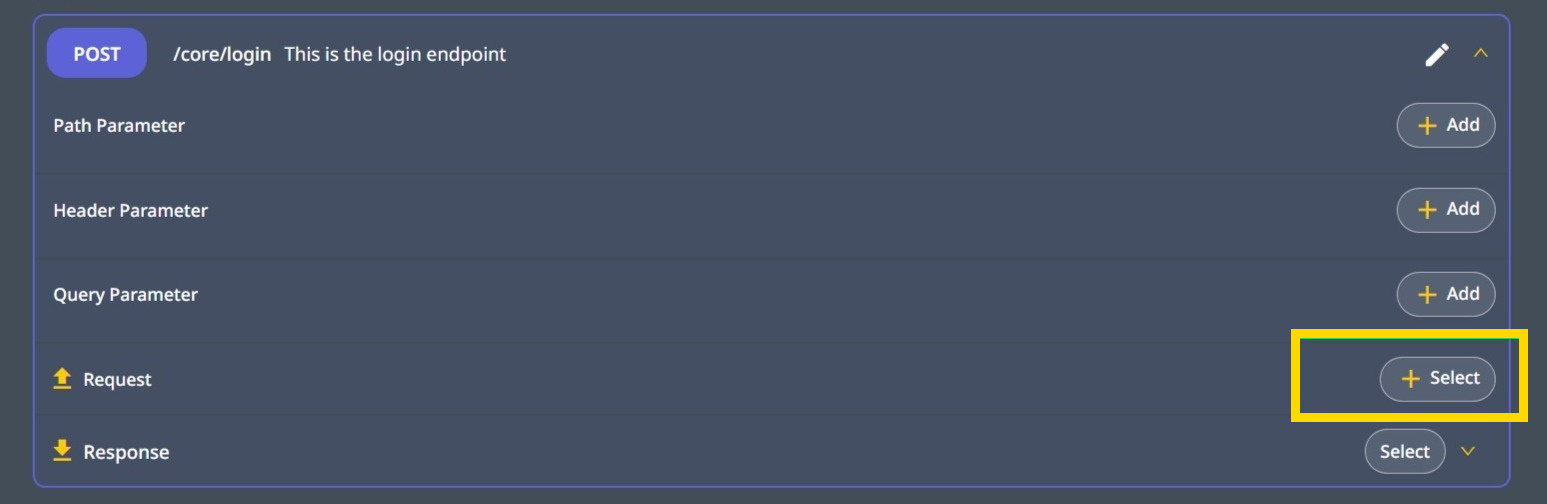
Once the arrow-down is clicked, a dialog like this is opened:

This dialog manually defines the endpoint to match the consumed API details fully.
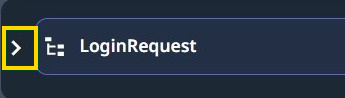
We have selected to edit the login endpoint. Our imaginary external service (the consumed API) uses basic authentication, and the username and password need to be defined in a Request rather than in the endpoint headers. Consequently, our method type should be POST.
A POST method requires a Request (sometimes called a Body).
The Request object #
Select the ‘select’ menu for the Request object:
Define a request object
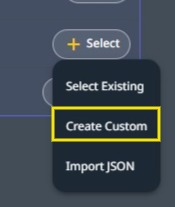
When clicking on Select, the following options are available:
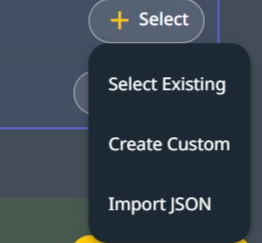
Select Existing: This option allows you to reuse objects you have already defined elsewhere in the app or dependent apps. In the current version of Wizzdi Cloud, when such an object is referenced. One should not change it.
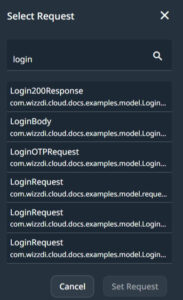
When Select Existing is selected, a dialog like this one appears. Use the Search text box to find the object you need.
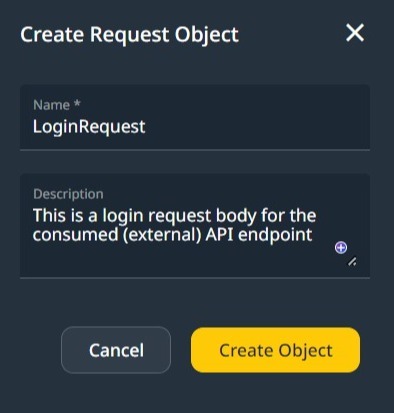
Create Custom: Use the tools described below to build a new object.
Define the Class name for the new Object; it should start with a capital letter.
Click on the newly created Object to view it.
Expand to view the current object structure.
Optionally, Click the pencil to edit the Object properties, the name, and the description. ![]()
Click on the plus icon to add a property to the Request Object.
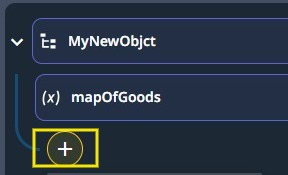
Click the [+] button to add a new property.

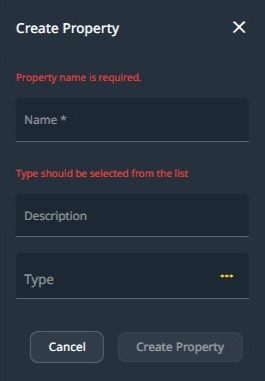
The Create Property Dialog
The property name should be a noncapital word.
The Description is for documentation purposes.
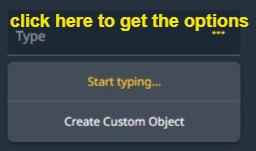
To search for a Type, you can start typing its name in the Type field and select it from the list that appears. Alternatively, click the Type field to open a new Type creation dialog. You can also click on the three dots button to open a more detailed type search dialog.
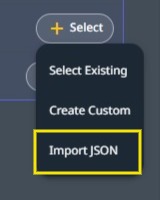
Import JSON: You can paste a JSON object to create a new object. This useful option lets you define the JSON structure without using the Create Custom option. Additionally, it can be easier for some users to type out the JSON structure directly.
We will first use Import JSON to define the Person Object (as an example).
- When the Import JSON dialog is displayed, fill in the required data here.
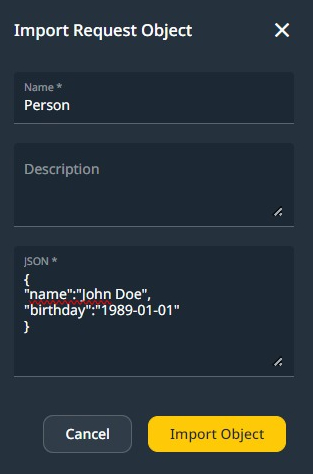
- Now, we have the Request object defined as a Person.


Importing JSON is limited; only basic data types such as String, float, boolean, integer, and long can be used.
Importing JSON Schema is not supported.
Building a Complex Object #
Click on Select at the right of the request object, then Select the Create Custom option.
Building a custom object.
The following dialog allows a selection of an existing Object or the creation of a new one.
0
Click on the Type text box to access the ‘Create Custom Object’ button. Click on it to show the ‘Create Custom Object’ dialog.
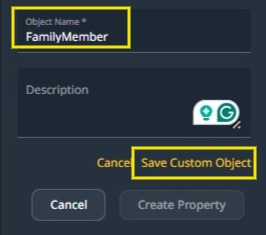
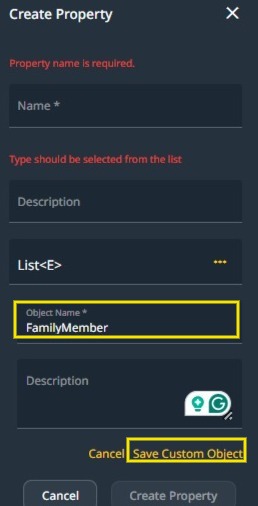
Define a name for the object. The name should start with a capital letter.
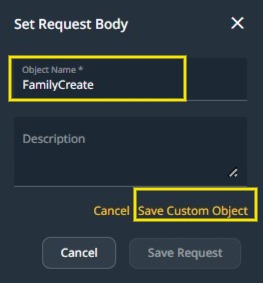
Save the new custom object
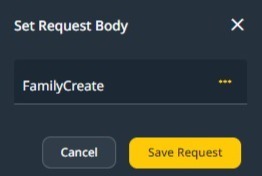
Save the Request Object using the created Family Create
Once the object is defined, we may populate it while editing the request object.

To modify the Object name and description, click the pencil icon on the right.
To expand the Request Object for editing, click on the left-side arrow marked in yellow.

Click on the [+] to create a new property.
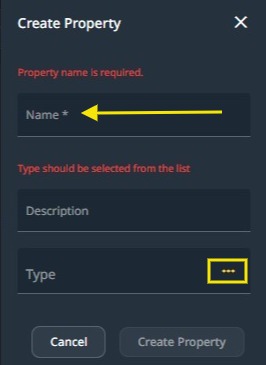
Create Property
Property names should start with a lowercase character.
Property Type
There are three options here:
- Start typing and select an existing type.
- Click on the Type field to open the Type/Object creation dialog.
Click on the Type field to allow selection or creation.
When Create Custom Object is selected, type the new Object’s name, starting with a Capital letter. Then click on ‘Save Custom Object’.
Create a new Object.
Once a new Property Type has been defined, you can start defining new properties (fields) inside the newly defined Type/Object.
The new Object has no fields initially. Use the [+] button to add properties to the new Object, including nested objects and Lists/Maps.
Lists and Maps
Lists and Maps are often required when implementing consumed or exposed API endpoints. They can be nested: a List of Lists or Maps containing Lists. Nesting is supported to any required depth.
Note:
Type safety is a core principle in Wizzdi Cloud, ensuring that data structures, including Lists and Maps, enforce consistency of element types
Lists
If the endpoint you’re using requires an array of properties, follow these steps:
- Click on the icon.
- Select the button.
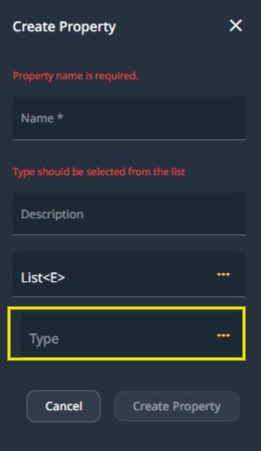
- In the Create Property menu, choose List as the type. Start typing List and select the option below.
Selecting the List type
- Once the List is selected, the following dialog appears:
Select the inner type of a list
- Click on the Type field (marked in yellow) to perform one of the following options:
- Start typing the name for the inner type.
- Click on the three dots button to open an expanded dialog for searching for a type.
- Select Create Custom Object to create a new Object.
- For option 3, see the subsequent steps:
- Create a new Object (Custom Type)
Create a new Custom Type (Object) for the List.
- Once the inner Custom Type (Object) is created, the List inner type changes:
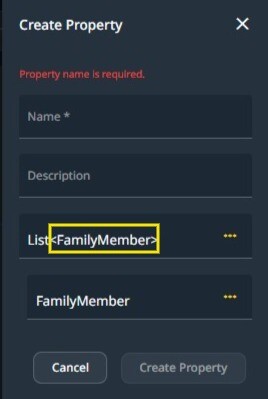
The List inner type changed to <FamilyMember>
Maps
A map is a data structure constructed from a list of entries containing a key and a value. The key is used to retrieve the value efficiently.
Key and Value can be Objects, including Lists or Maps. Contained Maps or Lists are similarly defined.
Note: Although rare, there are instances where such a data structure is used in API endpoints.
To create a property of a Map type, proceed as follows:
- Start typing map in the Create Property dialog and select the Map type from the list below.
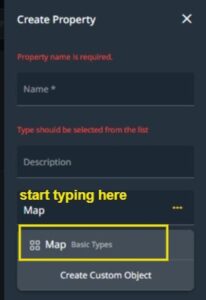
Create a property of Map type.
- The map is shown with the generic designation of <K, V>, where K stands for key and V stands for value.
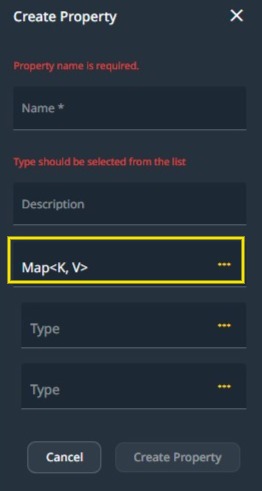
- Select the data type by typing, using the three dots menu, or creating a new type by clicking in the type text box. You can also use List or Map as nested types.
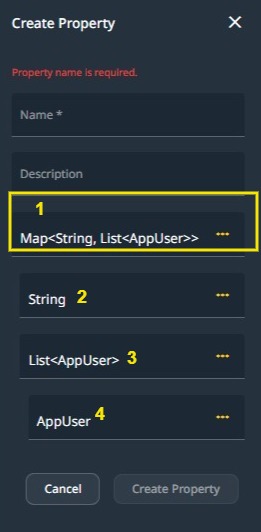
A String as a Key and a List of AppUser as a value.
- In the above image, the final type of the Map is displayed in 1.
- The type of the Key is displayed in 2.
- The type of the Value is displayed in 3.
- The value’s inner type (a List) is displayed in 4.
When selecting the Type as a List or a Map, a text box for the List type and two text boxes for a Map will open.
In the image above, 2 and 3 were opened when Map was selected. Then, when the map value’s type was changed to List, 4 was opened to define the list’s type.
#
Authentication #
When defining consumed API, we must define how API access is authenticated. We have two options:
- Basic Authentication: This method requires sending a username and password with each API request. The credentials are encoded and passed in the HTTP request’s header. It’s simple but less secure and is often used for less complex or internal systems.
- Token-Based Authentication: This method uses a token for access instead of credentials. Users authenticate once to receive a token, which is then used for subsequent requests. It’s more secure and scalable, suitable for modern web and mobile applications.
Note: when dealing with consumed (external) API, the authentication definitions should match the external API (consumed) definitions.
Authentication Setup for consumed API
Basic Authentication #
This is the default setup. There is nothing to set. Add authentication parameters following the external/consumed API documentation when defining each secured endpoint. These parameters are automatically defined if an OpenAPI document is available for import.
Token Based Authentication #
In token-based authentication, the login endpoint (sign-in) retrieves a token. It is defined as any other endpoint (see login example above) and returns a token. The path and parameters of this endpoint are usually documented in the external service documentation.
The retrieved token is usually automatically sent with any subsequent endpoint call. The consumed API interface provides a way to define this behavior following the consumed API definitions.
To set the common location where the token will be sent in every subsequent call to the API’s endpoints:
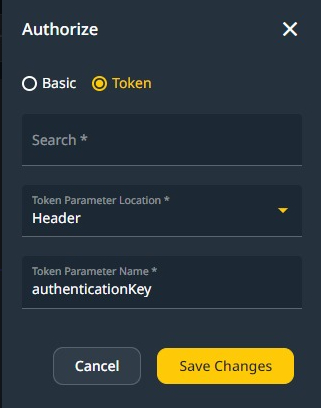
In the above dialog, every endpoint call is amended under the hood, with the token obtained in the login endpoint using a header parameter named authenticationKey.
Consumed APIs in Multiple Apps #
Leveraging Service-Oriented Architecture for Enhanced System Interconnectivity
Overview:
Service-Oriented Architecture (SOA) emphasizes building easily reusable and interchangeable software components. With the rise of microservices and distributed architectures, SOA’s principles have gained significant traction. In this context, Wizzdi Cloud offers a unique advantage by allowing one app to interact with another seamlessly.
1. Consumed APIs in an SOA Ecosystem:
- OpenAPI for Inter-App Communication: Consumed APIs are not restricted to external services like Gmail or SendGrid. When working within the Wizzdi Cloud ecosystem, one app can directly import the OpenAPI of another Wizzdi Cloud app. This paves the way for fluid data exchange and service usage between different apps, fostering a cohesive network of interconnected applications.
- Standardization with OpenAPI: By leveraging the OpenAPI specification, Wizzdi Cloud ensures that app-to-app communication adheres to a recognized and consistent format. This standardization reduces integration overhead and potential discrepancies, allowing for a smoother interoperability experience.
- Multiple Options for Reusability:
- Adding Dependencies:
- ***************************
- Integration without SOA:
- Wizzdi Cloud allows users to add dependencies to their apps. This means that users can incorporate additional functionalities or components into their applications. These components can be self-developed or sourced from the Wizzdi or other Market Places.
- When components are added this way, the original backend of the app is merged with the backend of the external elements. This creates a unified, singular backend system.
- As a result of this merging, the database created is a collective of entities (or pieces of data) from all the incorporated components. This implies a more integrated data structure.
- These components’ services (or functionalities) communicate internally in this approach. There isn’t a need for external calls or connections; everything is managed within the unified system.
- Integration with SOA:
- SOA, or Service-Oriented Architecture, is a design principle where services (functionalities) are made available to other parts of an organization through APIs (Application Programming Interfaces).
- In the context of Wizzdi Cloud, when using an SOA approach, each service or component becomes a separate instance in the Wizzdi Customer’s Cluster. This means each service operates independently and is like its own mini-application. You have the option to deploy the apps either on-premise or on a different cloud service.
- The integration or communication between these services happens purely through their respective APIs. Instead of having a single, merged backend, each service communicates externally with other services.
Summary: #
- Without SOA: Consider blending ingredients to make a single smoothie. You can’t distinguish the individual components; they are fully integrated. This is how Wizzdi Cloud allows apps and their dependencies to merge.
- With SOA: Imagine a tray of different cups with a distinct beverage. You must sip from each cup separately if you want a taste of two or more. They remain distinct; it’s an external process if you want them to interact. This represents the separate instances communicating through APIs in Wizzdi’s SOA approach.
These two approaches would depend on the project’s specific needs and design preferences. Some may prefer the seamless integration of the non-SOA method, while others might find the modular and independent nature of the SOA approach more suitable.
- Adding Dependencies:
2. Benefits of SOA Integration in Wizzdi Cloud:
- Reusable Components: Embracing SOA principles means you can design an app component once and then deploy and utilize it across multiple applications. This not only reduces redundant effort but also ensures consistency across projects.***********
- Scalability & Flexibility: As your system grows, you can easily add or modify new services without disrupting the entire application ecosystem.
- Optimized Maintenance & Upgrades: With distinct apps handling specific services, updating or patching one service doesn’t necessitate taking down the entire system. This modular approach streamlines maintenance tasks and minimizes downtime.
3. OpenAPI Publishing in Wizzdi Cloud:
Every app built on Wizzdi Cloud automatically publishes its exposed APIs via an OpenAPI document. This self-documenting feature means that any other app, within or outside the Wizzdi Cloud environment, can access and understand the functionalities. It acts as an open invitation, encouraging other systems to leverage the services provided by the app.
In summary, Wizzdi Cloud’s support for SOA principles and its inherent capabilities around Consumed APIs position it as a robust platform for creating intricate, interconnected software ecosystems. Whether you’re aiming for a vast web of interlinked applications or want two apps to share resources, Wizzdi Cloud provides the tools and frameworks to make it happen effortlessly.