Deployments #
The user interface lists all previous deployments on the Wizzdi Cloud customer’s cluster. This is for information only; it shows previous versions and the currently running version, if any.

For example:
Deploying an App #
Deploying a committed App to the customer cluster is carried out as follows:
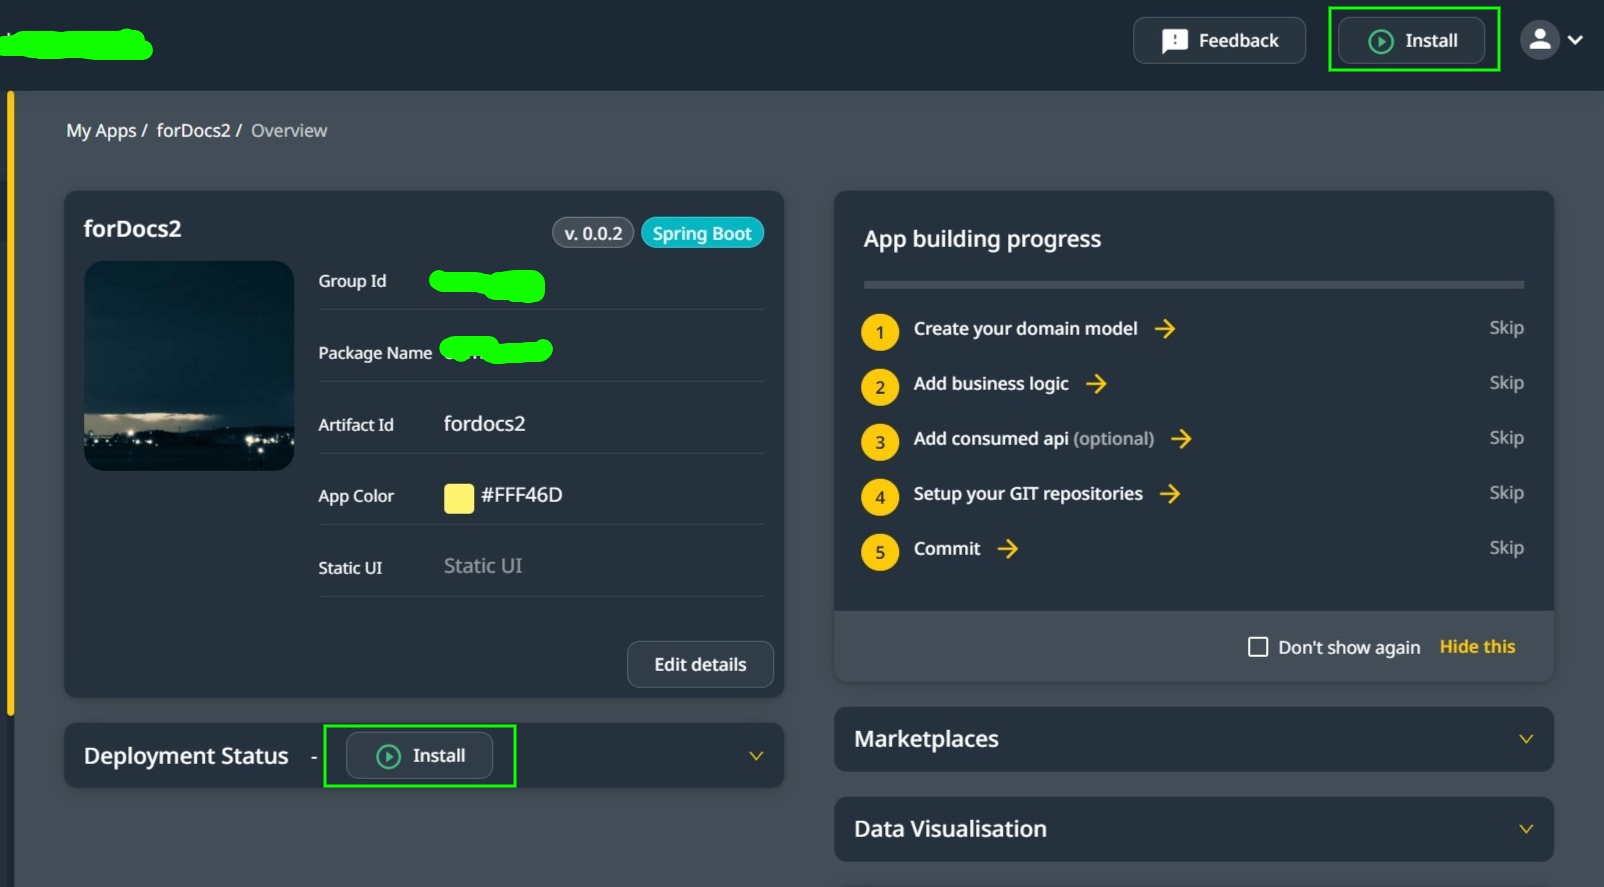
You can install(deploy) it from the Overview menu or the Install button on some screens.
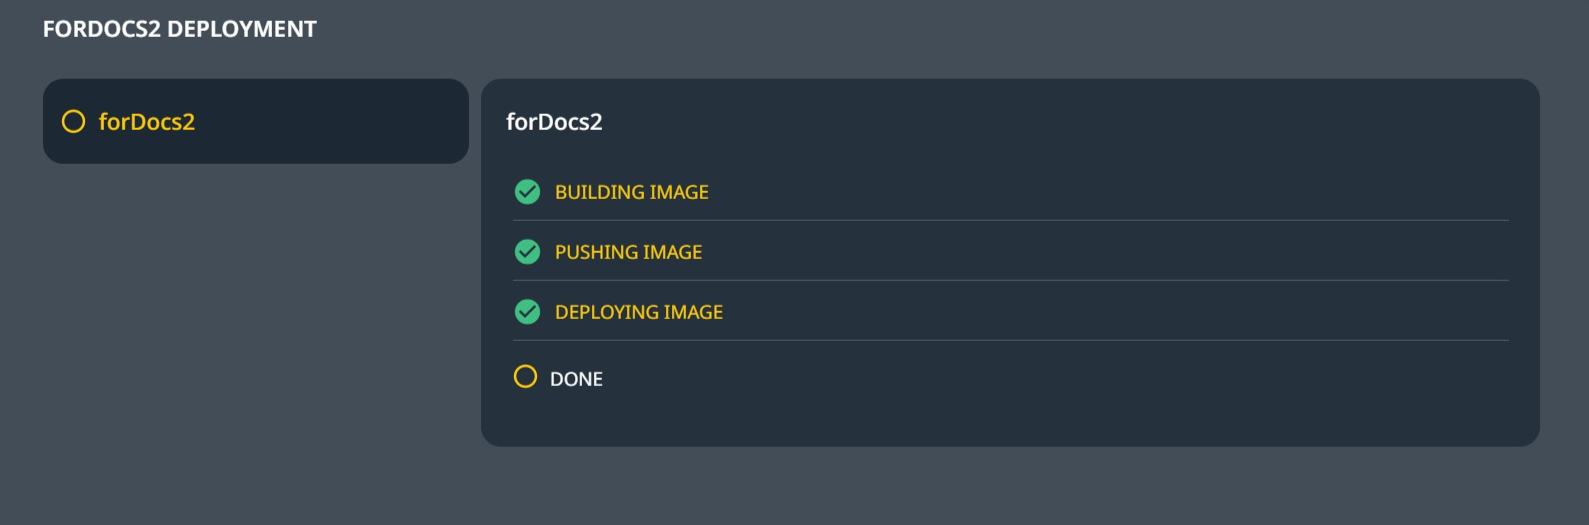
If you click on Install on either of the two options, you will be presented with the deployment progress report.
When you update the app and commit again, the Install button will become Upgrade, and a new version will be deployed.
 #
#
Accessing APIs #
Once the App is deployed (wait a few minutes till it becomes alive), it can be accessed from your browser as follows:
From Swagger (Open API interface) :
- Switch to App Overview and copy the Swagger URL from there
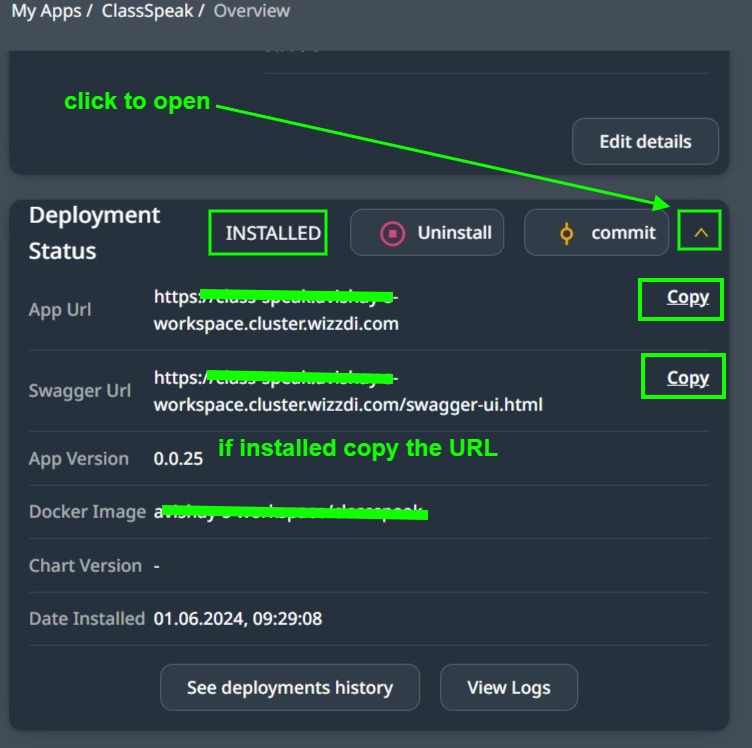
The URL is available if the app is deployed on the Wizzdi customer’s cloud. Copy the URL into the browser.
Swagger User Interface #

The Tags and API endpoints list comprises CRUD APIs created by Wizzdi Cloud, custom APIs from the APP, and some default APIs related to AppUsers.
Using the Swagger interface #
- The first step is to sign in; the admin.username and admin.password are defined in the Properties section. See below a discussion on how to set values to both admin.username and admin.password properties.
- Find the login API
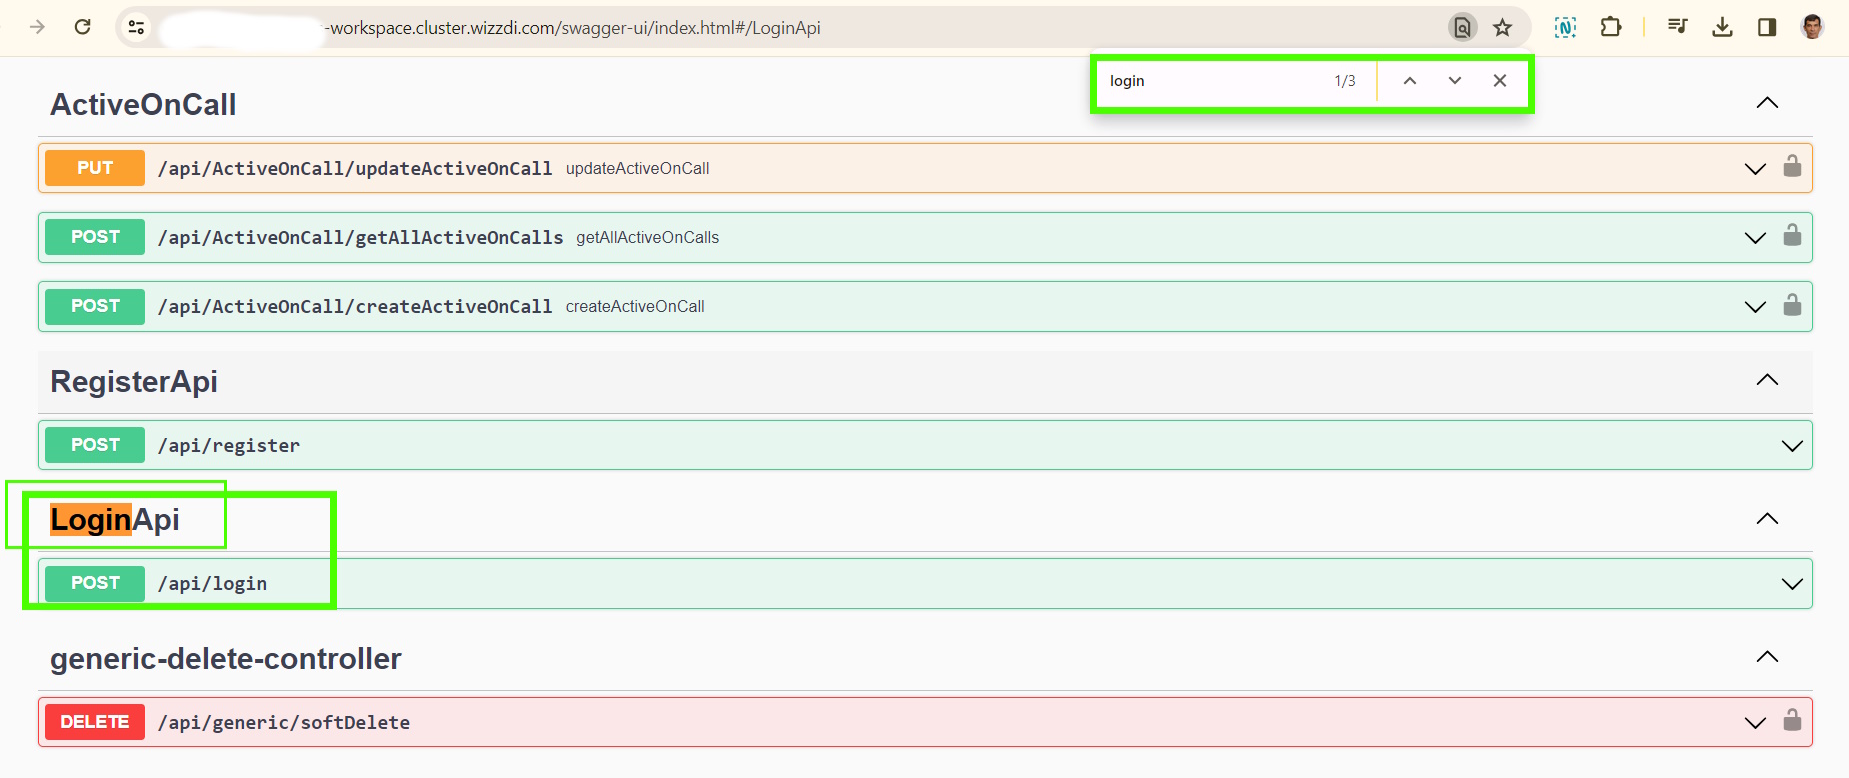
-
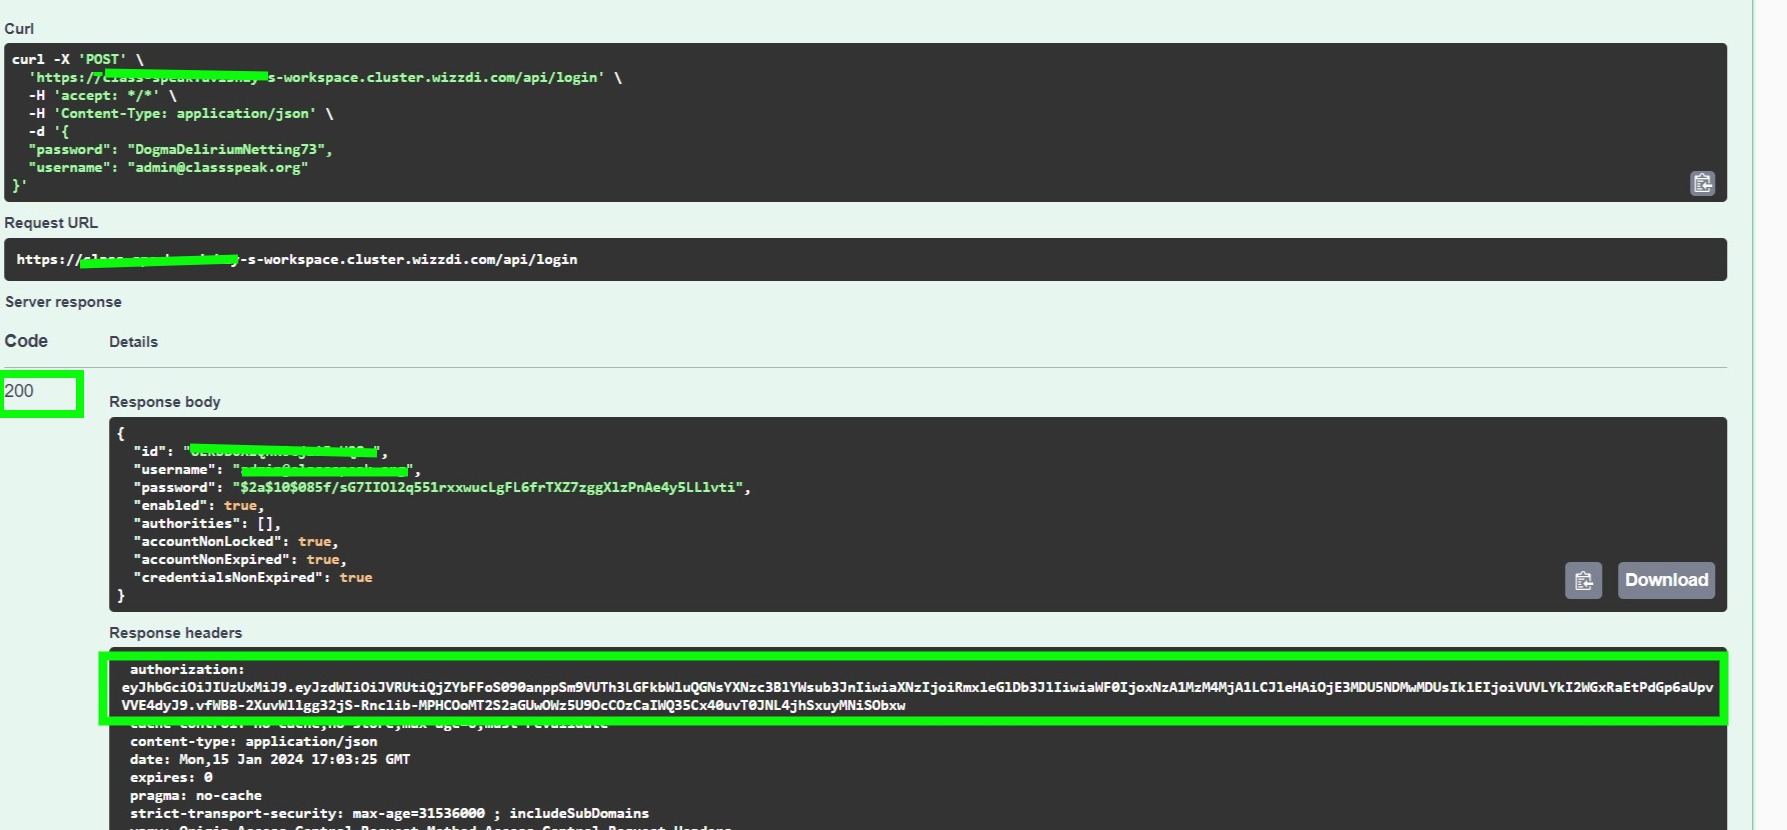
- Open the login API and click on ‘Try It Out.’

The screen after ‘Try it out’ is clicked.

-
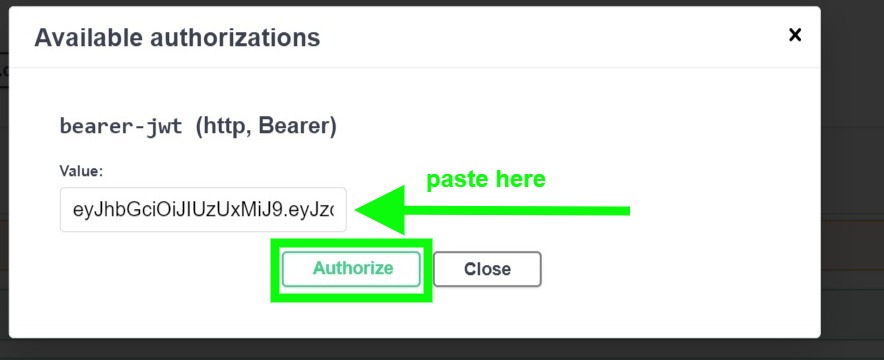
- You now need to copy the Authorization key and paste it into Authorize.
- Click on the Authorize button:

-
- Paste now the copied authorization into the text box and click Authorize.
- Paste now the copied authorization into the text box and click Authorize.
- You can now access endpoints in the API. The Authorization key is usually good for 24 hours.
- Let’s test the API to validate that the key was correctly copied, and we can execute all endpoints.
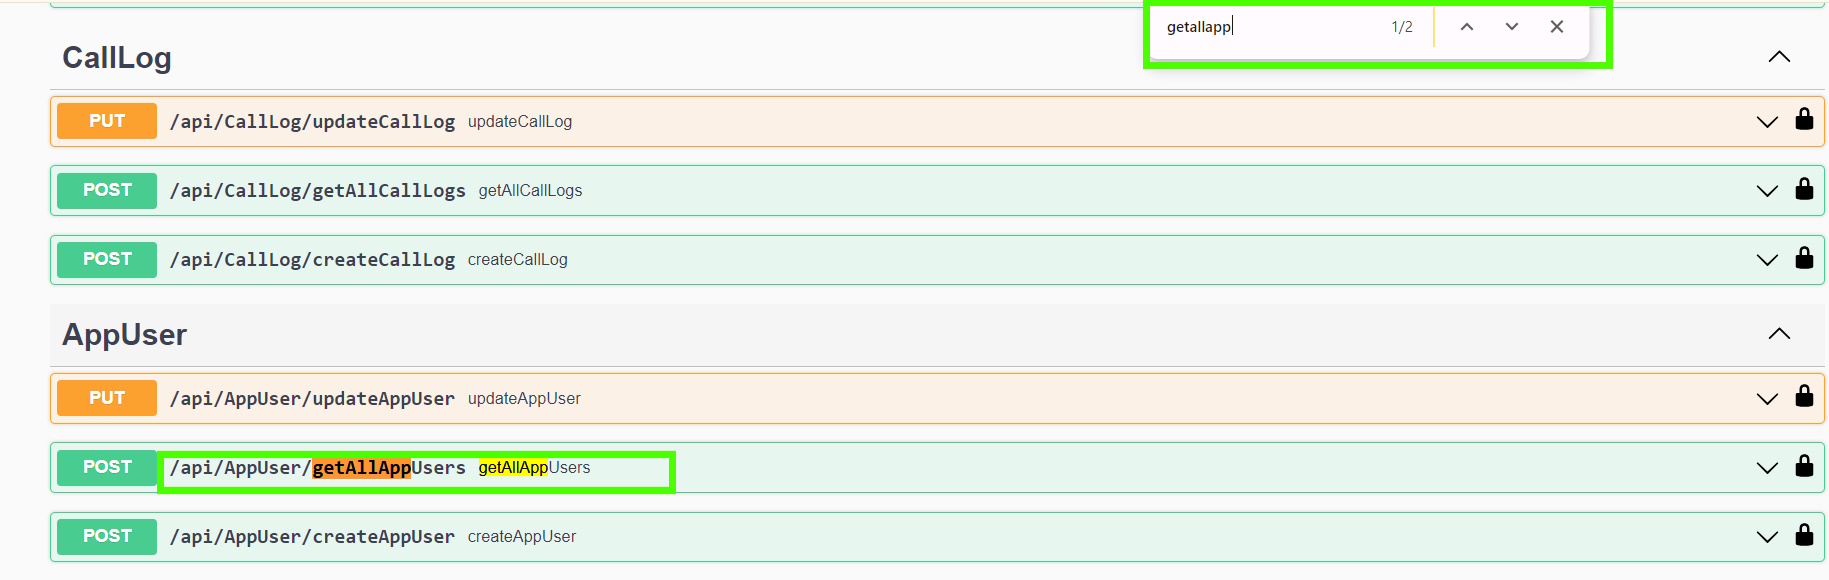
- Let’s find existing users.
-
- Click on ‘try it out’.
- Use this body for the POST method:
-
Providing some of the available filters on the endpoint
- And the result
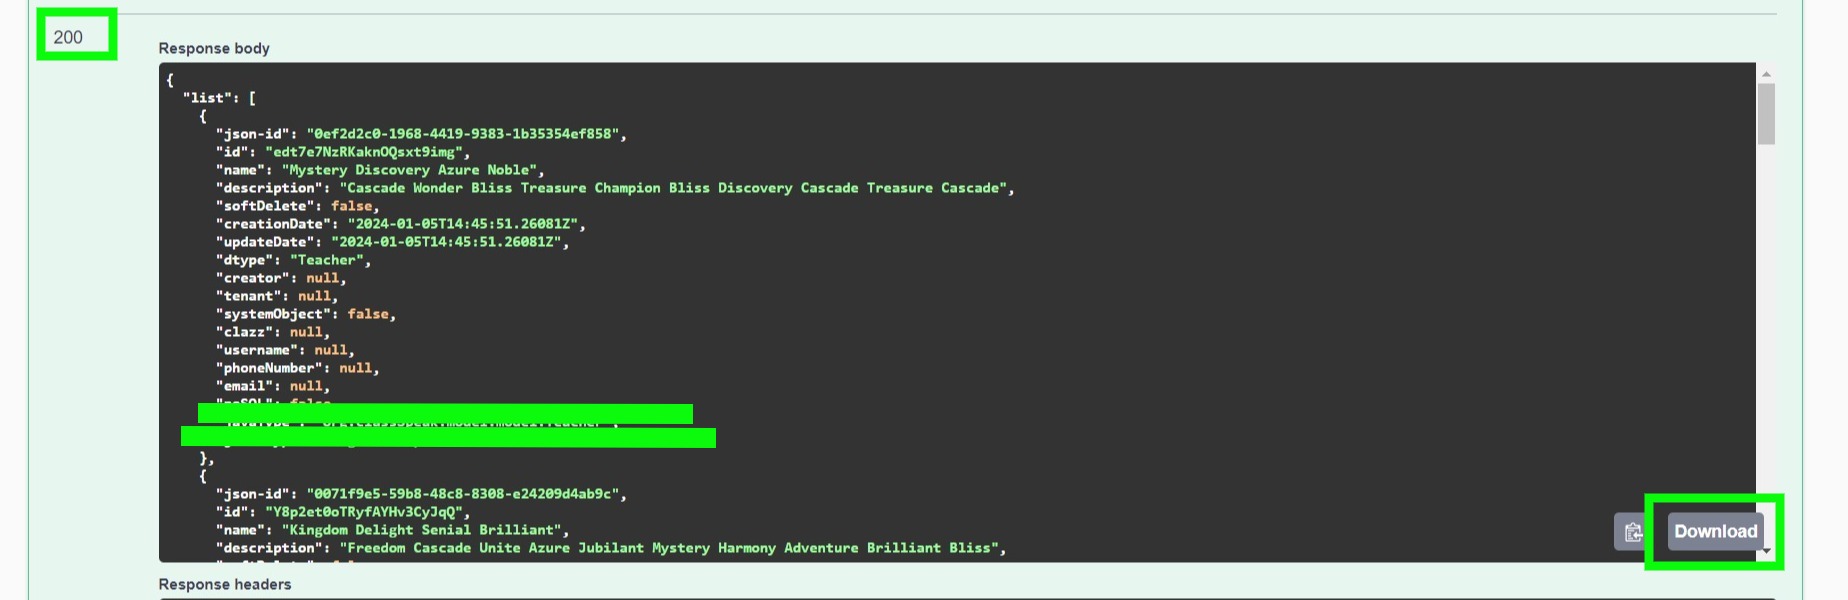
The JSON-ID
#
The concept of json-id in JSON response is used to reference specific items within the JSON structure. This is a common practice in data serialization and management, especially in complex JSON objects that contain nested structures or multiple instances of similar objects.
Here’s a brief explanation of the concept:
- Unique Identifier: Each
json-idis a unique identifier that differentiates each object or item in the JSON structure. This uniqueness is crucial for accurately identifying and referencing specific elements within the JSON data. - Reference and Linking: In complex JSON structures, especially those representing relational data,
json-idcan create links or references between objects. For instance, an object in one part of the JSON might reference another object using itsjson-id. - Client Side expansion: The client code must be able to expand such responses correctly. Code samples in some client-side programming languages can be found on Wizzdi.com.
#
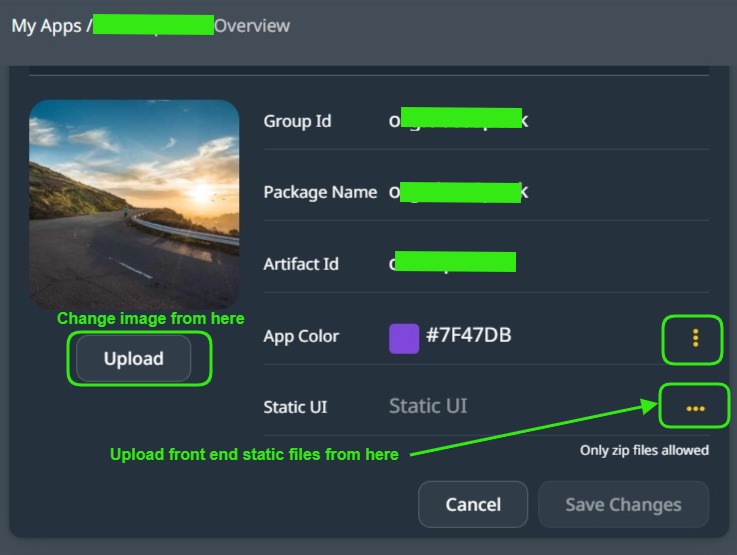
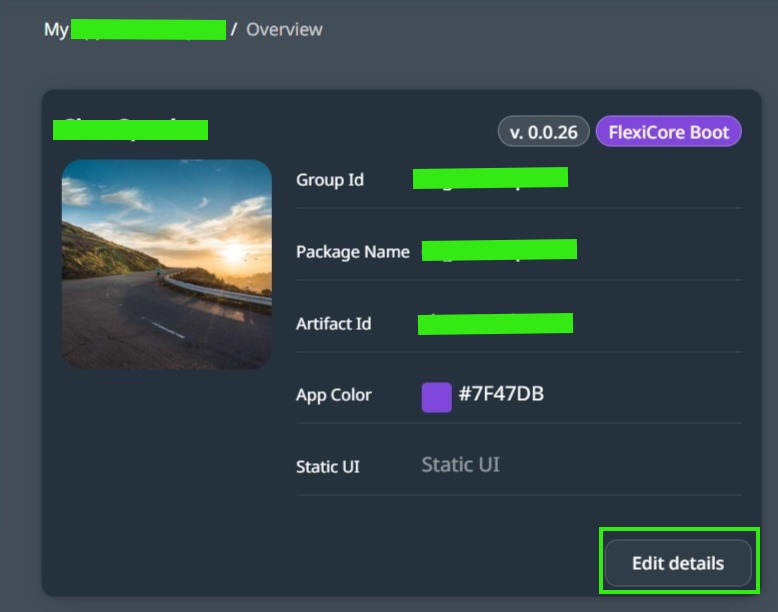
Accessing static files #
You can create a web app using your technology of choice to access the exposed API endpoints. Once the application is ready, you can upload it to the App, and the server will serve it.
Access the app overview from the left-side menu. Then click on Edit Details.
Upload Static Files