Introduction #
Within Wizzdi Cloud, users have tools to oversee the app’s commits, versions, and repositories. While the intricacies of the generated code might remain hidden, the platform ensures that these files are safely stored in repositories. Think of this as a safeguard for your work, akin to an external storage or backup system for your digital creations.
Note: External Repositories store the generated code by Wizzdi Cloud. Wizzdi Cloud’s elements, such as diagrams and flows, are not stored in external repositories.
Concepts #
Commits #
-
- Explanation: A commit represents a set of changes or additions to a project’s files. When you commit, you save a version of your files at a particular time. It pertains to generated code and files only.
- Purpose in Wizzdi Cloud: This allows you to track Wizzdi Cloud’s modifications to the code, offering a history of changes and the ability to revert to earlier states if needed.
Versions #
-
- Explanation: In software, a version refers to your application’s specific state or iteration.
- Purpose in Wizzdi Cloud: Versions let you manage and navigate through different stages of your app’s development, ensuring you can return to a previous version if necessary or progress forward with updates and enhancements. Wizzdi Cloud supports versioning of the App as it evolves. This is unrelated to the generated code, done internally, and not connected to the external repositories defined. Also, the specific version can be selected when you publish your App to a private or Wizzdi public repository.
Branches #
-
- Explanation: In software development, a “branch” is a separate line of development that diverges from the main codebase and is often used for developing new features or testing. Each branch represents an independent line of development, allowing developers to work on different features or fixes without interfering with the main or other branches. This concept is crucial in version control systems, where multiple branches can be managed simultaneously.
- In Wizzdi CloudIn Wizzdi Cloud, the use of the “Generated” and “Master” branches reflects a specific workflow designed to manage and integrate code changes effectively:
- Generated Branch: This branch contains code automatically generated by the Wizzdi Cloud system. It serves as a repository for the system-generated code, ensuring a clear distinction between what the system produces and what code- developers manually create or modify. Wizzdi Cloud continuously updates this branch as the system generates new code or updates.
- Master Branch: The Master branch is where code-developers actively work on the code. It represents the primary branch of the codebase, typically containing the most stable and up-to-date version of the application code that is manually developed or modified by the developers. Developers use this branch for manual coding, feature development, bug fixes, and other tasks that require human intervention.
The interaction between these two branches typically involves:
- Merging from Generated to Master: When Wizzdi Cloud generates new code or updates, these changes are committed to the Generated branch. Developers can merge these changes from the Generated branch into the Master branch. This process allows for integrating the latest system-generated code with the manually developed code, ensuring that the application benefits from automated generation and developer expertise.
- Separation of Concerns: Keeping the system-generated code in a separate branch (Generated) clearly distinguishes between what the system produces and what developers create or modify. This separation helps manage the codebase efficiently, making it easier to track changes, resolve conflicts, and maintain a stable codebase.
- Collaboration and Version Control: Using these branches facilitates collaboration among team members and aids in effective version control. Developers can work on the Master branch without worrying about immediate changes from the system, while system-generated updates can be reviewed and merged systematically.
This workflow ensures a harmonious integration of automated code generation with human-led development, contributing to an efficient and streamlined development process in Wizzdi Cloud.
Code in Repositories
Even if you aren’t interacting with the code directly, Wizzdi Cloud ensures your work is backed up. It pushes the created code files to a repository, safeguarding your intellectual property.
You have several options when choosing where to store this code:
Repositories #
-
- Explanation: A repository (or ‘repo’ for short) is a centralized place where code is stored and managed. It contains all the files and the historical record of changes made to those files.
- Repositories in Wizzdi Cloud store generated code branches with optional code developers’ work so that Wizzdi Cloud can merge changes to the underlying code.
Public GitHub #
-
- Explanation: GitHub is a popular platform for hosting and managing code repositories. A public account means your repository’s contents are visible to anyone online.
- Benefits: Easy accessibility and visibility.
Private Repositories #
-
- Explanation: This is a version of GitHub/BitBucket where your repositories are hidden from public view and only accessible to those to whom you have granted permission.
- Benefits: Greater control over who sees your work. It provides more privacy than a public account. Private repositories are now free to use in GitHub. When a repository is created from Wizzdi Cloud, it is private.
Self-Hosted GitLab #
-
- Explanation: GitLab is another code hosting platform similar to GitHub. A self-hosted GitLab means you run It on your servers.
- Benefits: Offers increased control over your repositories. You can ensure privacy and security based on your personal or organizational preferences. However, it must remain accessible online for proper integration with Wizzdi Cloud.
Summary #
Managing commits, versions, and repositories in Wizzdi Cloud gives you greater control over your app’s development history. By understanding the terminology and the importance of repositories as backups for your intellectual property, you can make informed decisions on how and where to store your work.
Note:
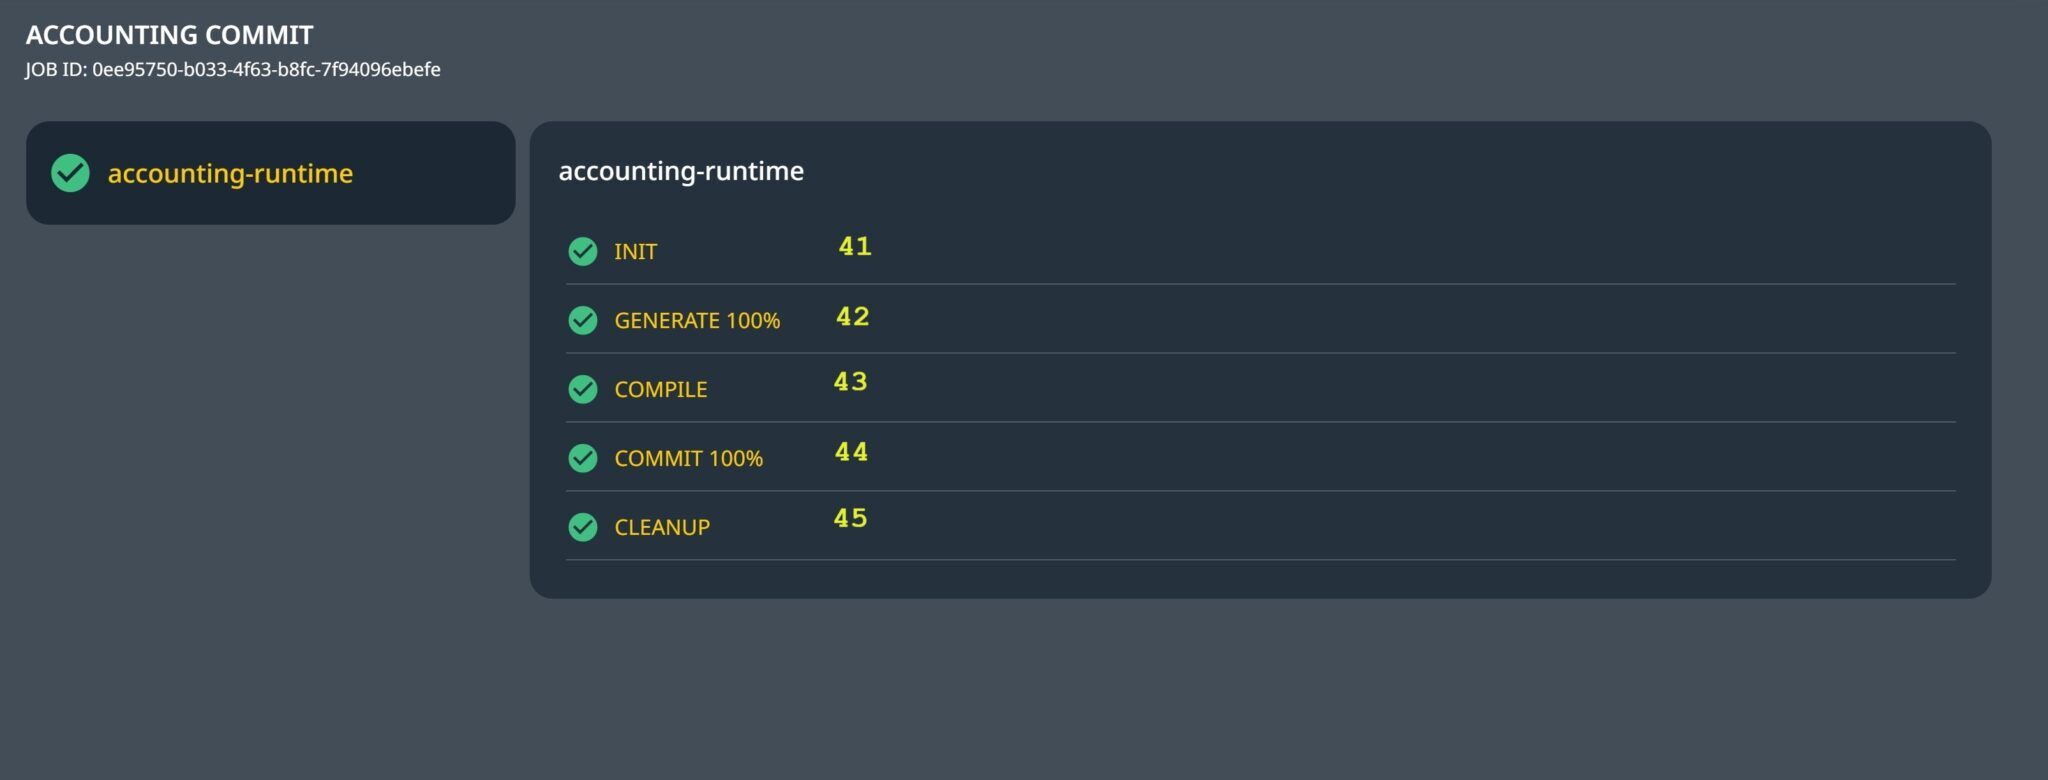
In the Wizzdi Cloud workflow, generating, calculating, and committing the code are consolidated into a single action initiated by pressing the “Commit” button. Here’s how it works:
- One-Step Process: When you press the “Commit” button in the Wizzdi Cloud interface, the system automatically triggers a sequence of actions. First, it generates the necessary code based on the current configuration or parameters set within the system. Then, it immediately compiles this generated code, turning it into an executable format.
- Seamless Integration: Following the compilation, the system commits the compiled code to the designated repository without requiring additional input or separate action. This step involves saving all the recent changes, ensuring that the latest version of the code is stored and tracked.
- Optional Deployment on Wizzdi Cloud Customer Cluster: You can deploy the compiled and committed code on a Wizzdi Cloud customer cluster following the commit. This step is optional and depends on whether you use Wizzdi Cloud’s infrastructure for deployment. If you opt for this, the system will handle the deployment process, utilizing Kubernetes to manage and scale the containerized application.
It’s important to note that the Docker build script in the committed code offers the flexibility to deploy the application on any server, not just Wizzdi Cloud. This allows you to deploy your application in various environments, depending on your requirements and preferences.
How to Use #
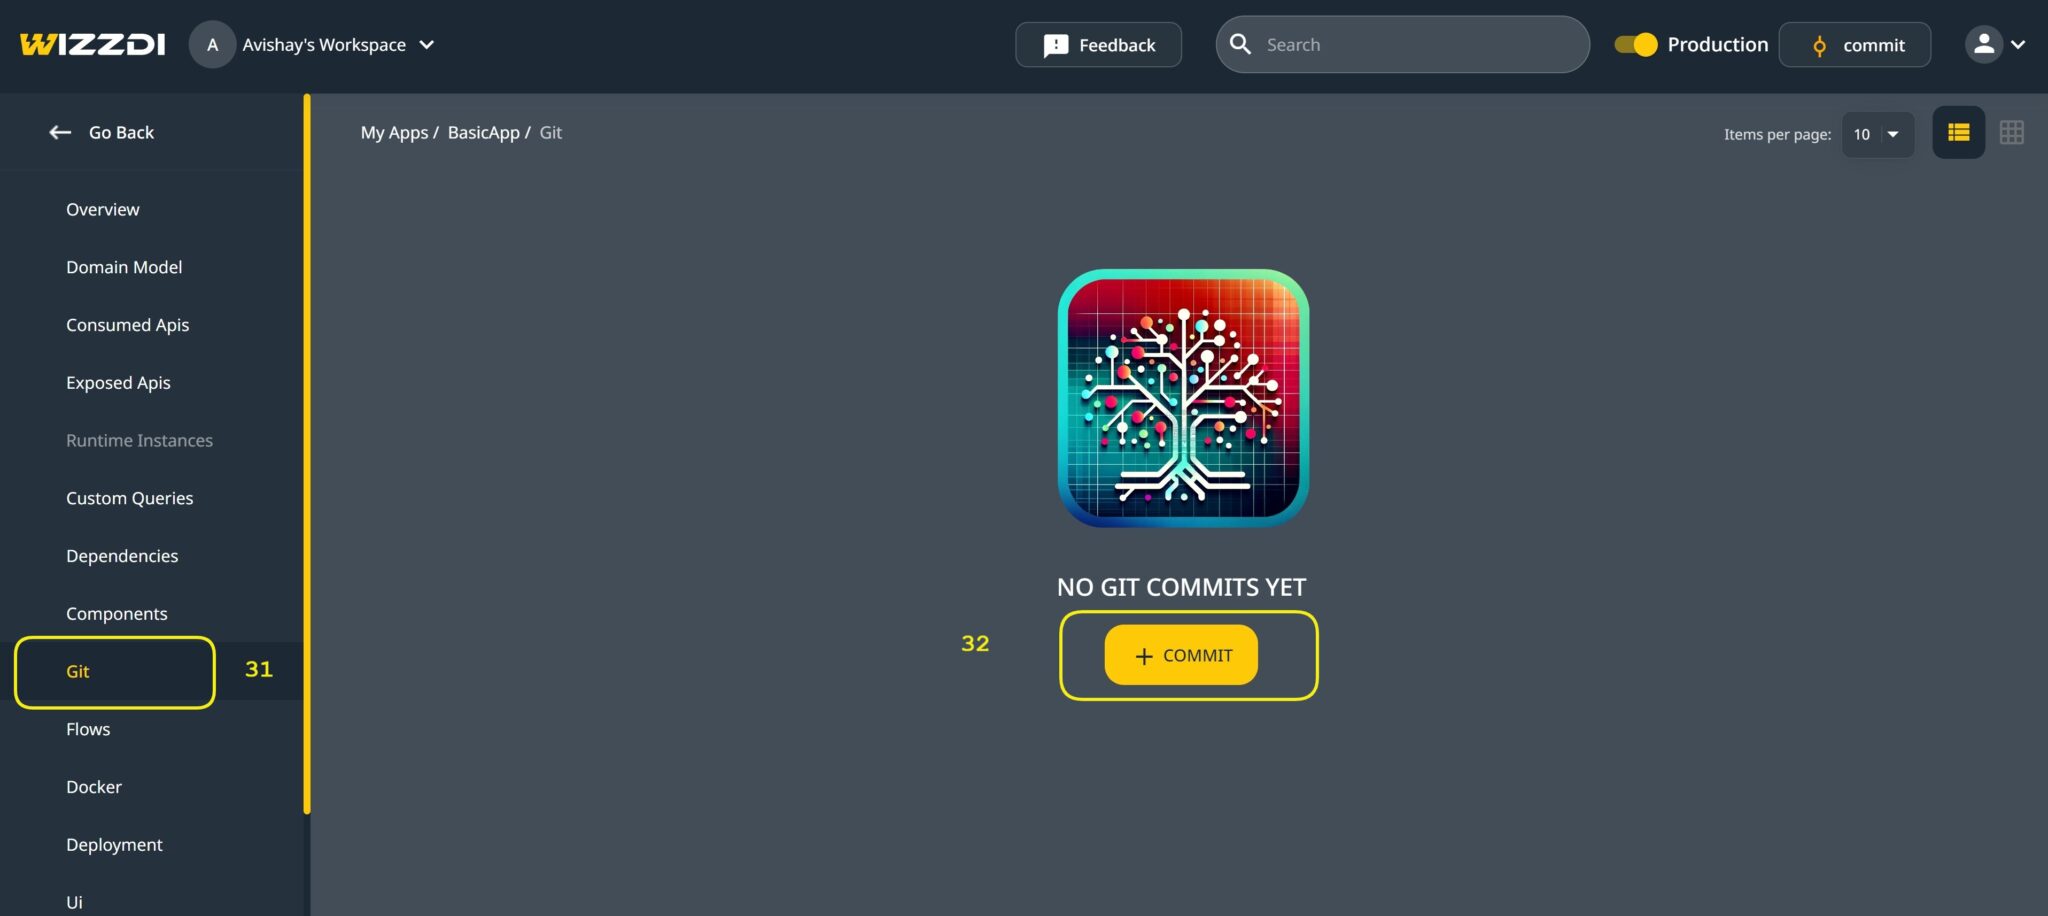
Accessing Git is carried out from the left-side menu.

Access Git from the left side menu [1], then set a remote repository for the App [2].
Setting up #
We need to define a remote repository for each app we create for the app files.
Click on ‘+ Add Remote‘.
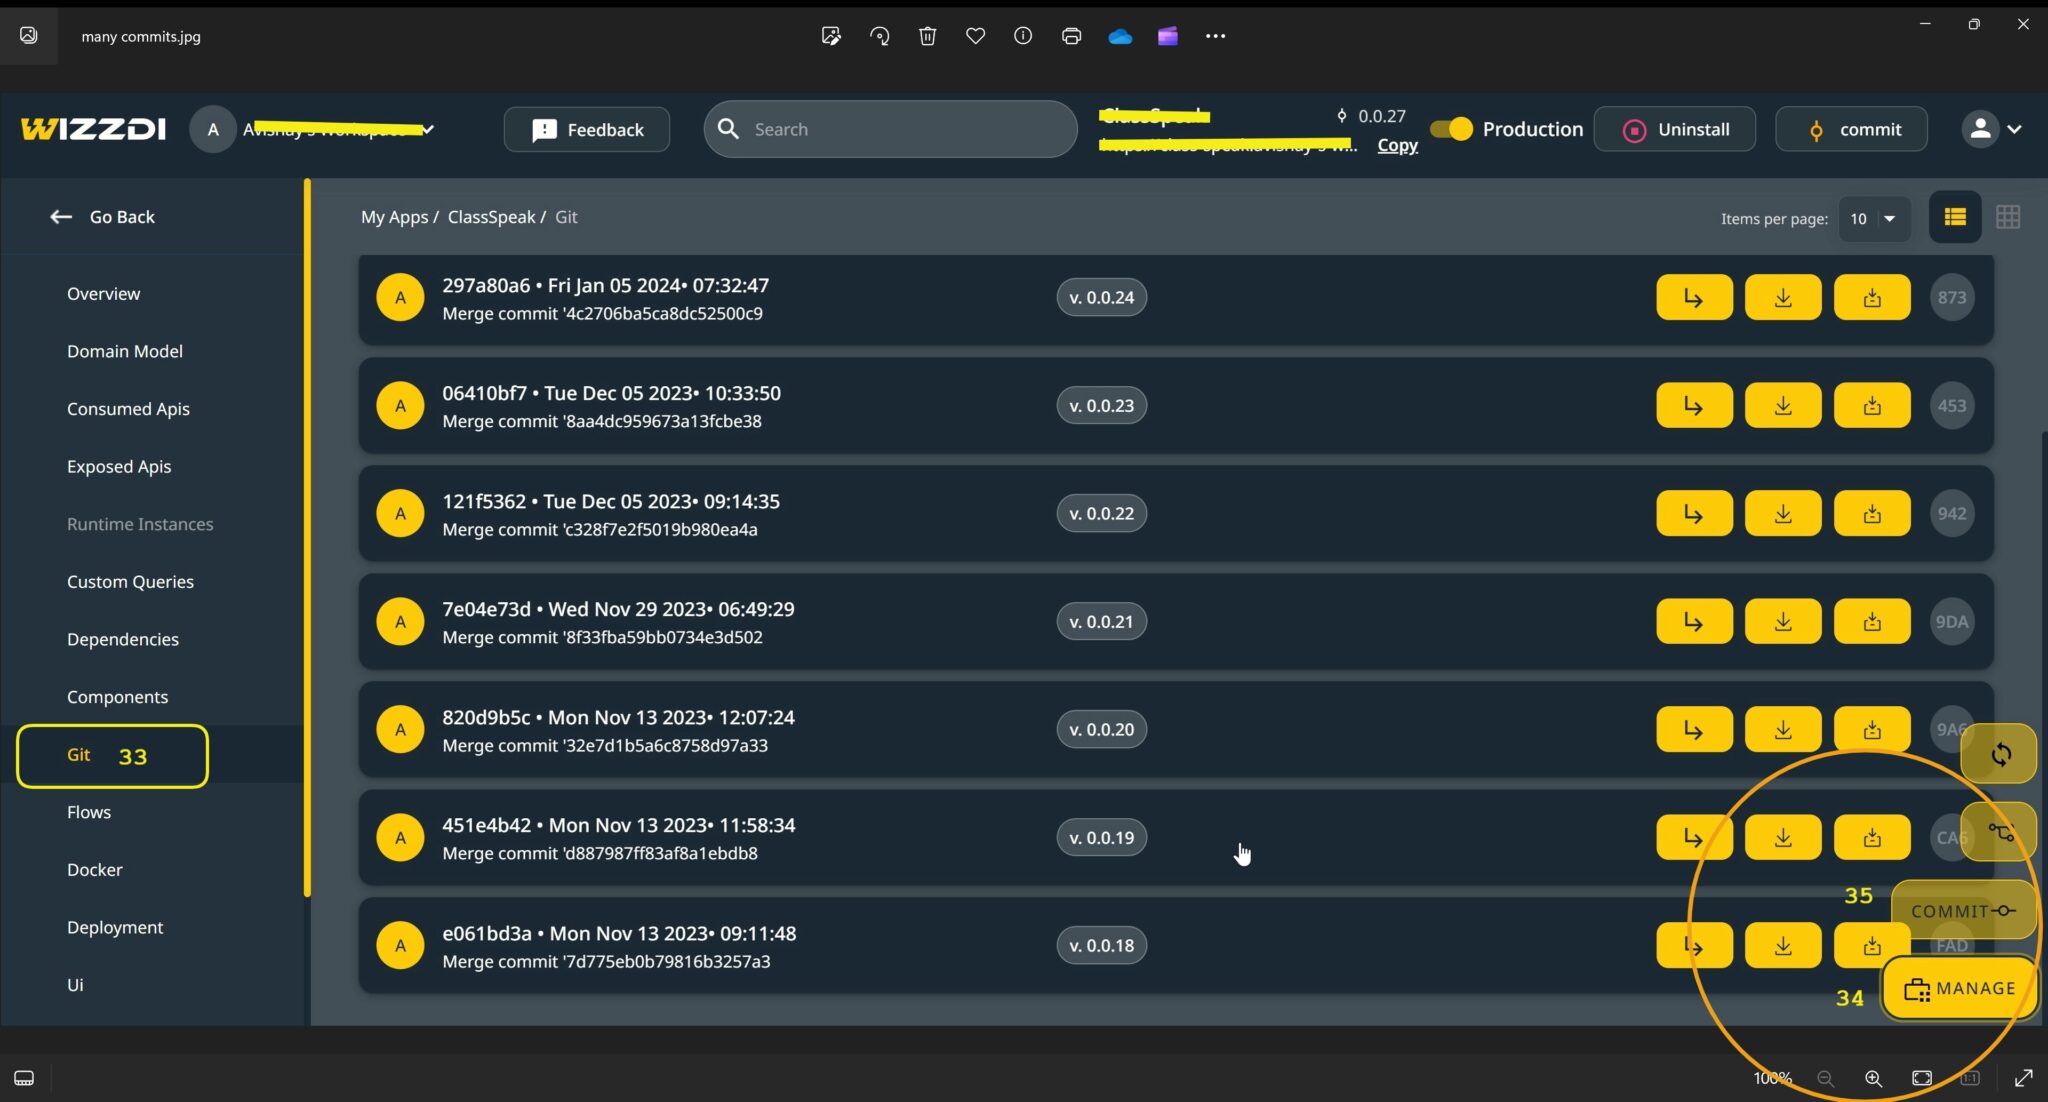
The above screenshot shows that a remote is not yet set; when it is, there is a clear indication on the right side of the version information.
The easiest way to define a remote repository is to use a GitHub account. If the same email is used on both GitHub and Wizzdi Cloud are identical, the process is straightforward.
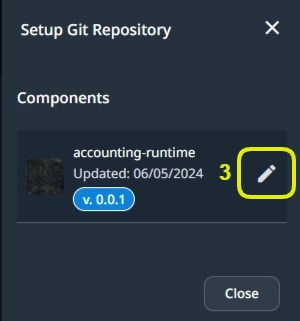
Click on the pencil icon[3] to define a remote repository. If you have already linked your Wizzdi Cloud account email with GitHub, you will be presented with
Connect With GitHub #
When setting up a remote in Wizzdi Cloud for the first time, you must set up your preferred repositories’ server. If you have an account in GitHub, you can authorize Wizzdi Cloud to access it. This is a one-time operation for a Wizzdi Cloud account.
Make sure you have a GitHub account before you proceed. This account should use the same email to sign up for Wizzdi Cloud.
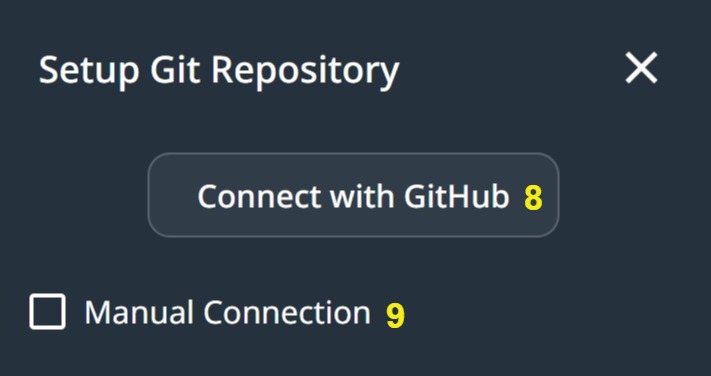
Click on Connect with GitHub [8] to access GitHub authorization.
When signing up for Wizzdi Cloud, you may select your existing GitHub account.
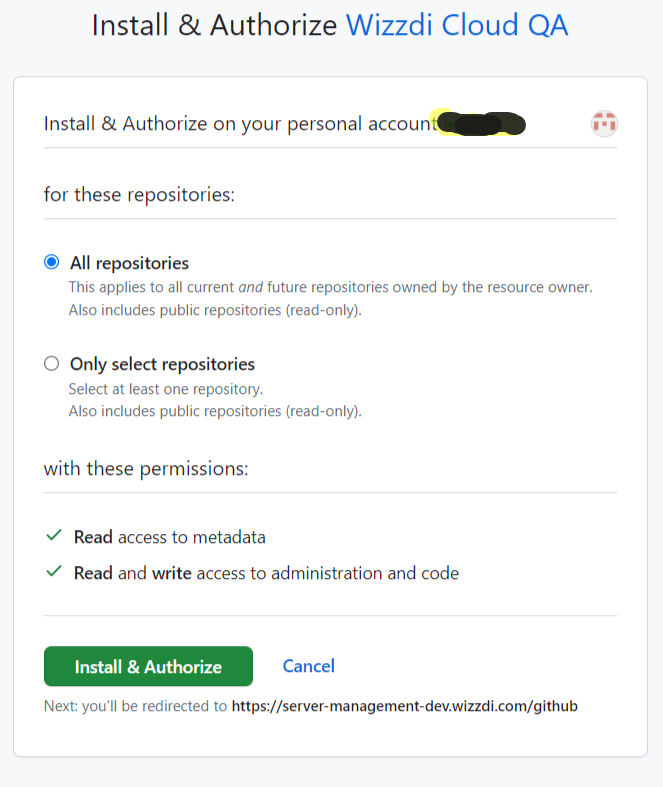
Alternatively, you may select Manual Connection [9] to connect to another remote code hosting provider, such as BitBucket or a private GitLab server.
Connect With BitBucket #
BitBucket is a popular code hosting service. Unlike GitHub, BitBucket isn’t free for private repositories.
After creating an account on BitBucket, you must use your account username and an App Password to create a repository on Wizzdi Cloud.
Generate Credentials #

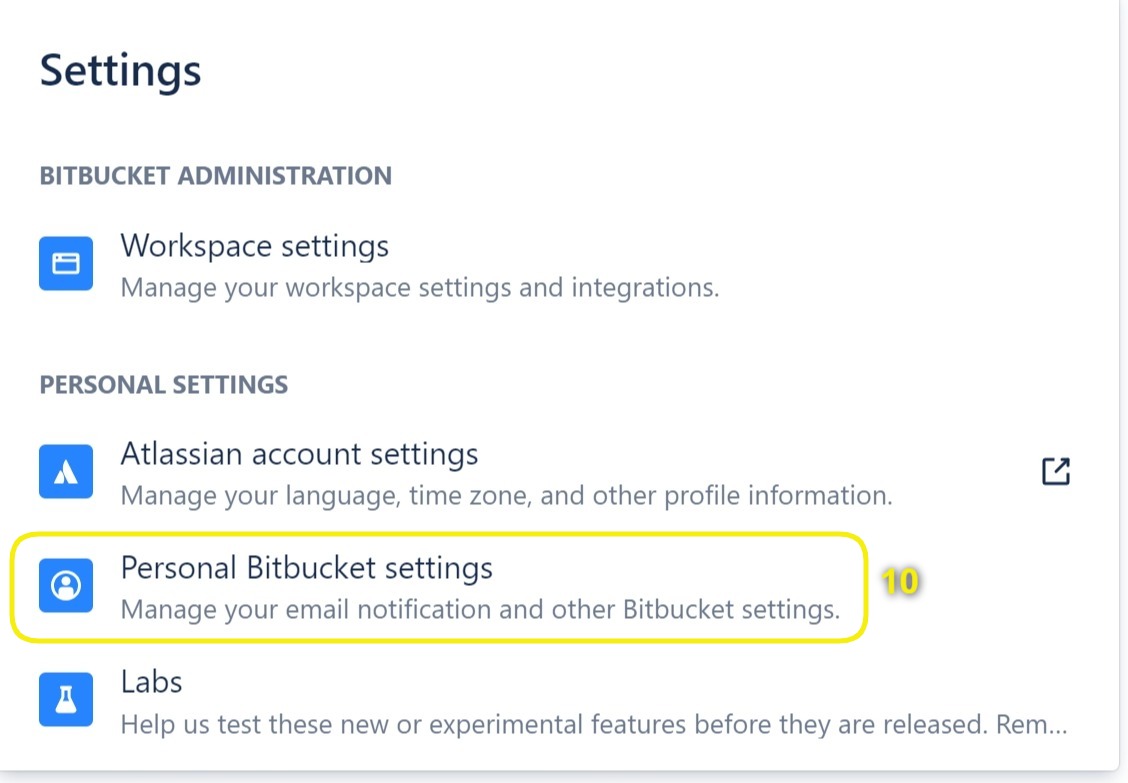
Access the Personal Bitbucket settings [10].
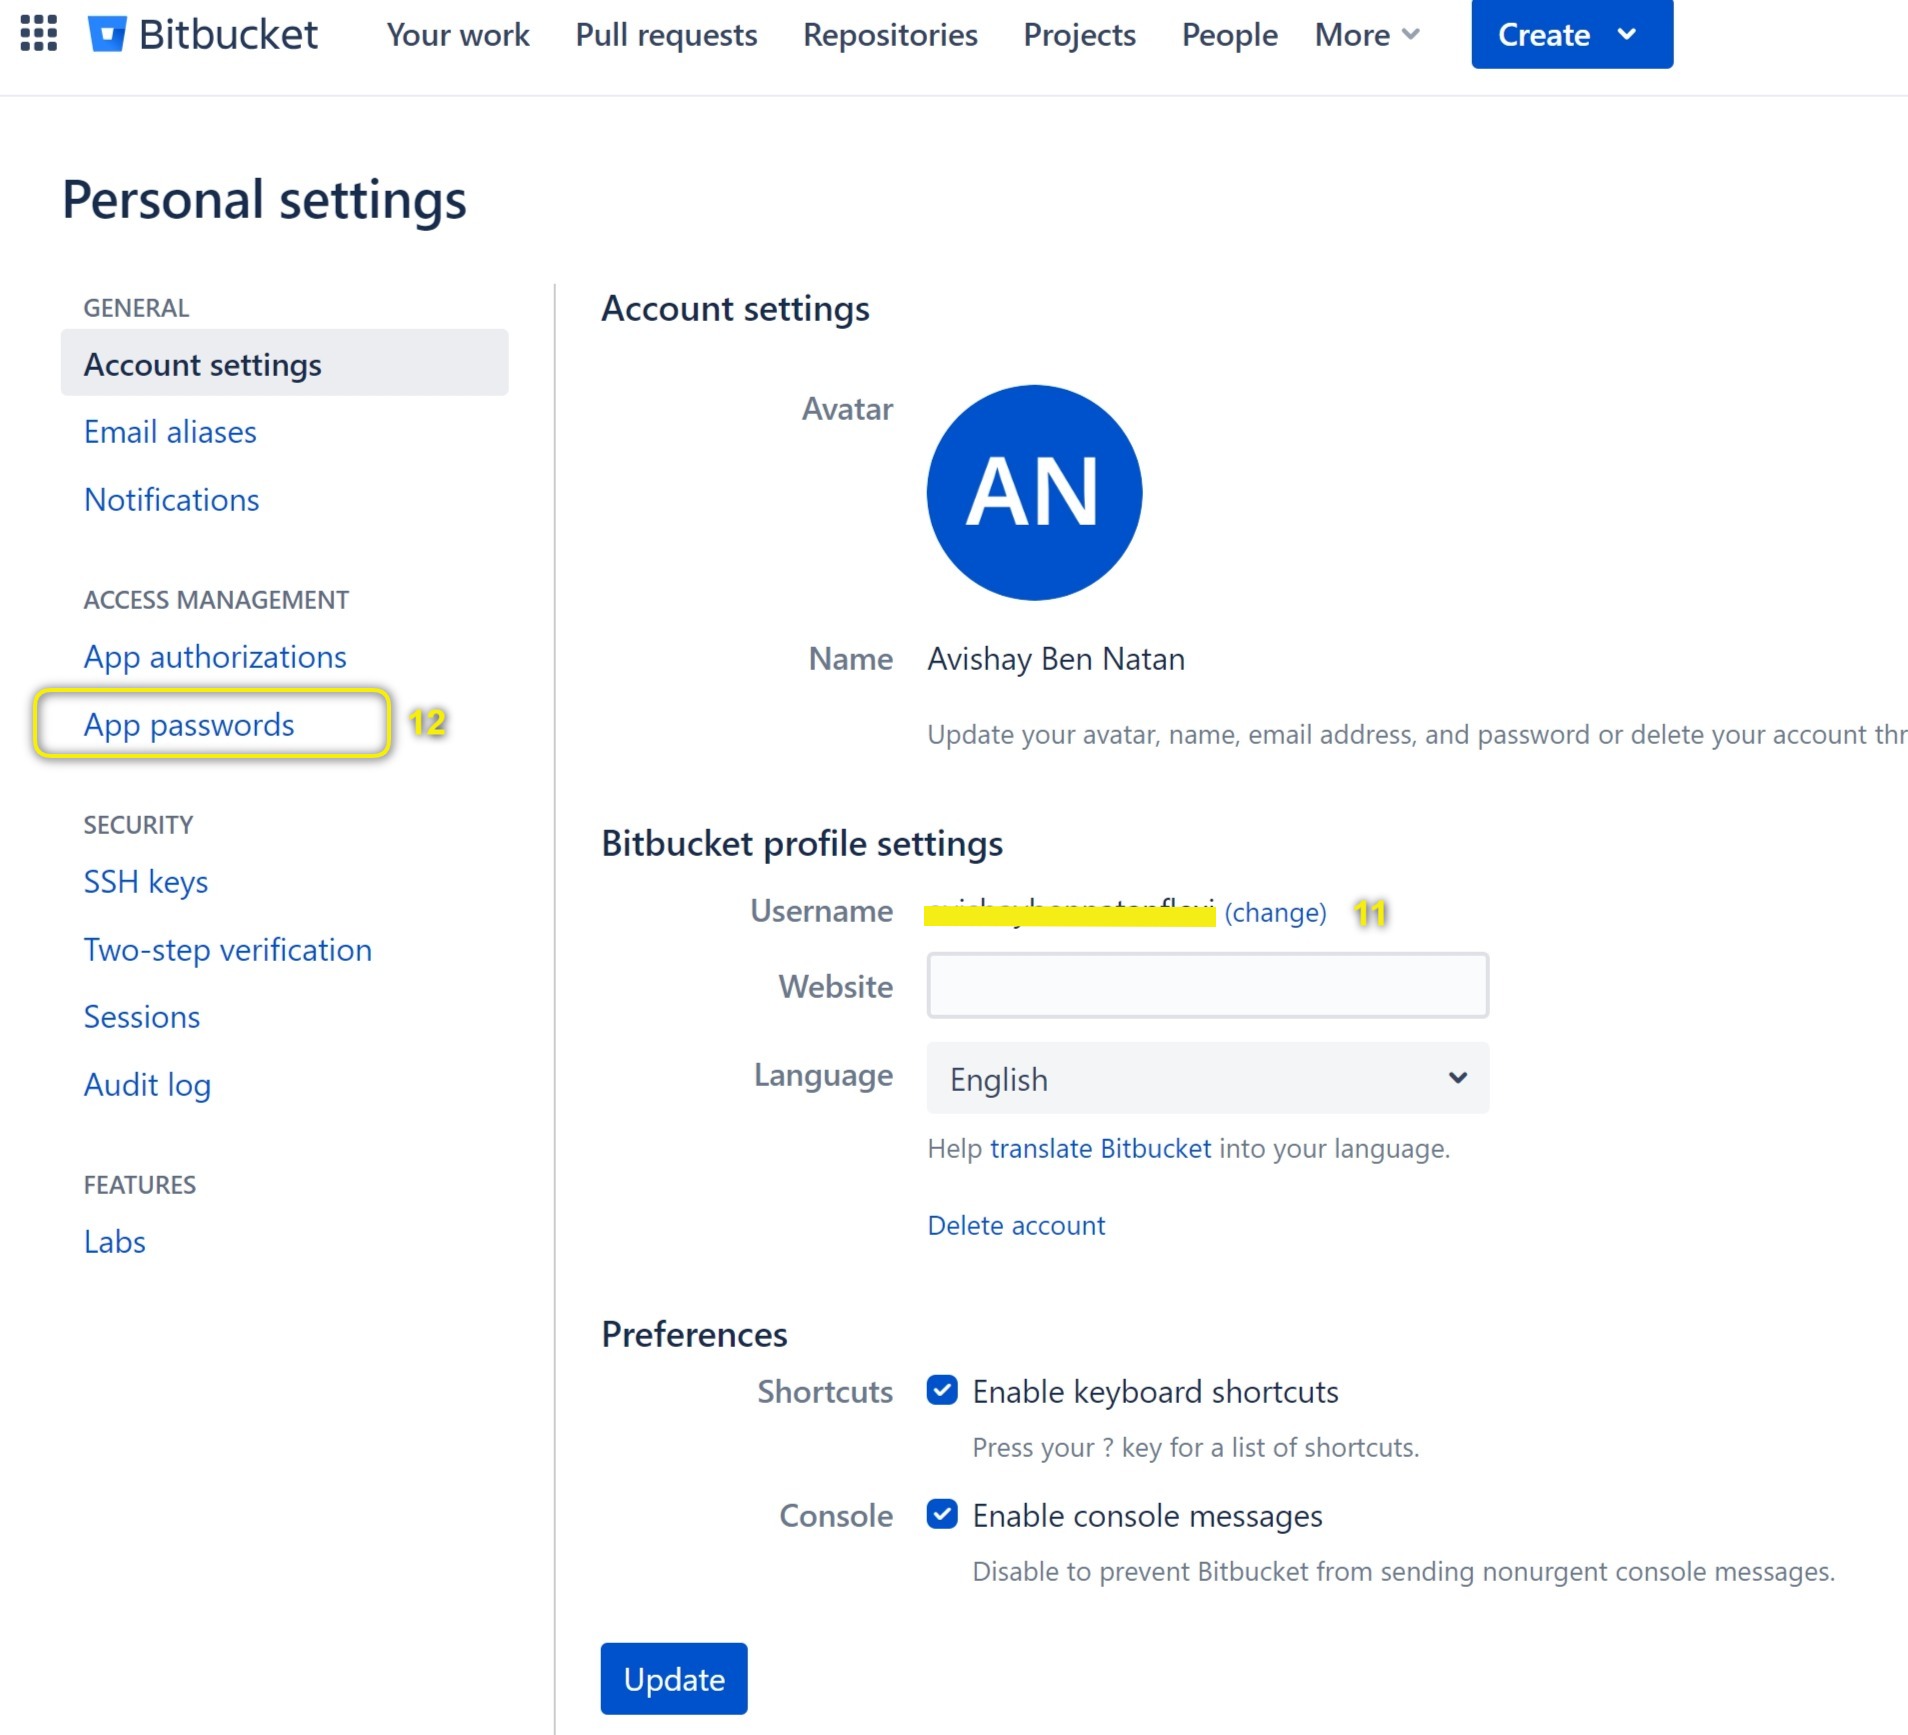
Keep the username [11] and click on App passwords [12].
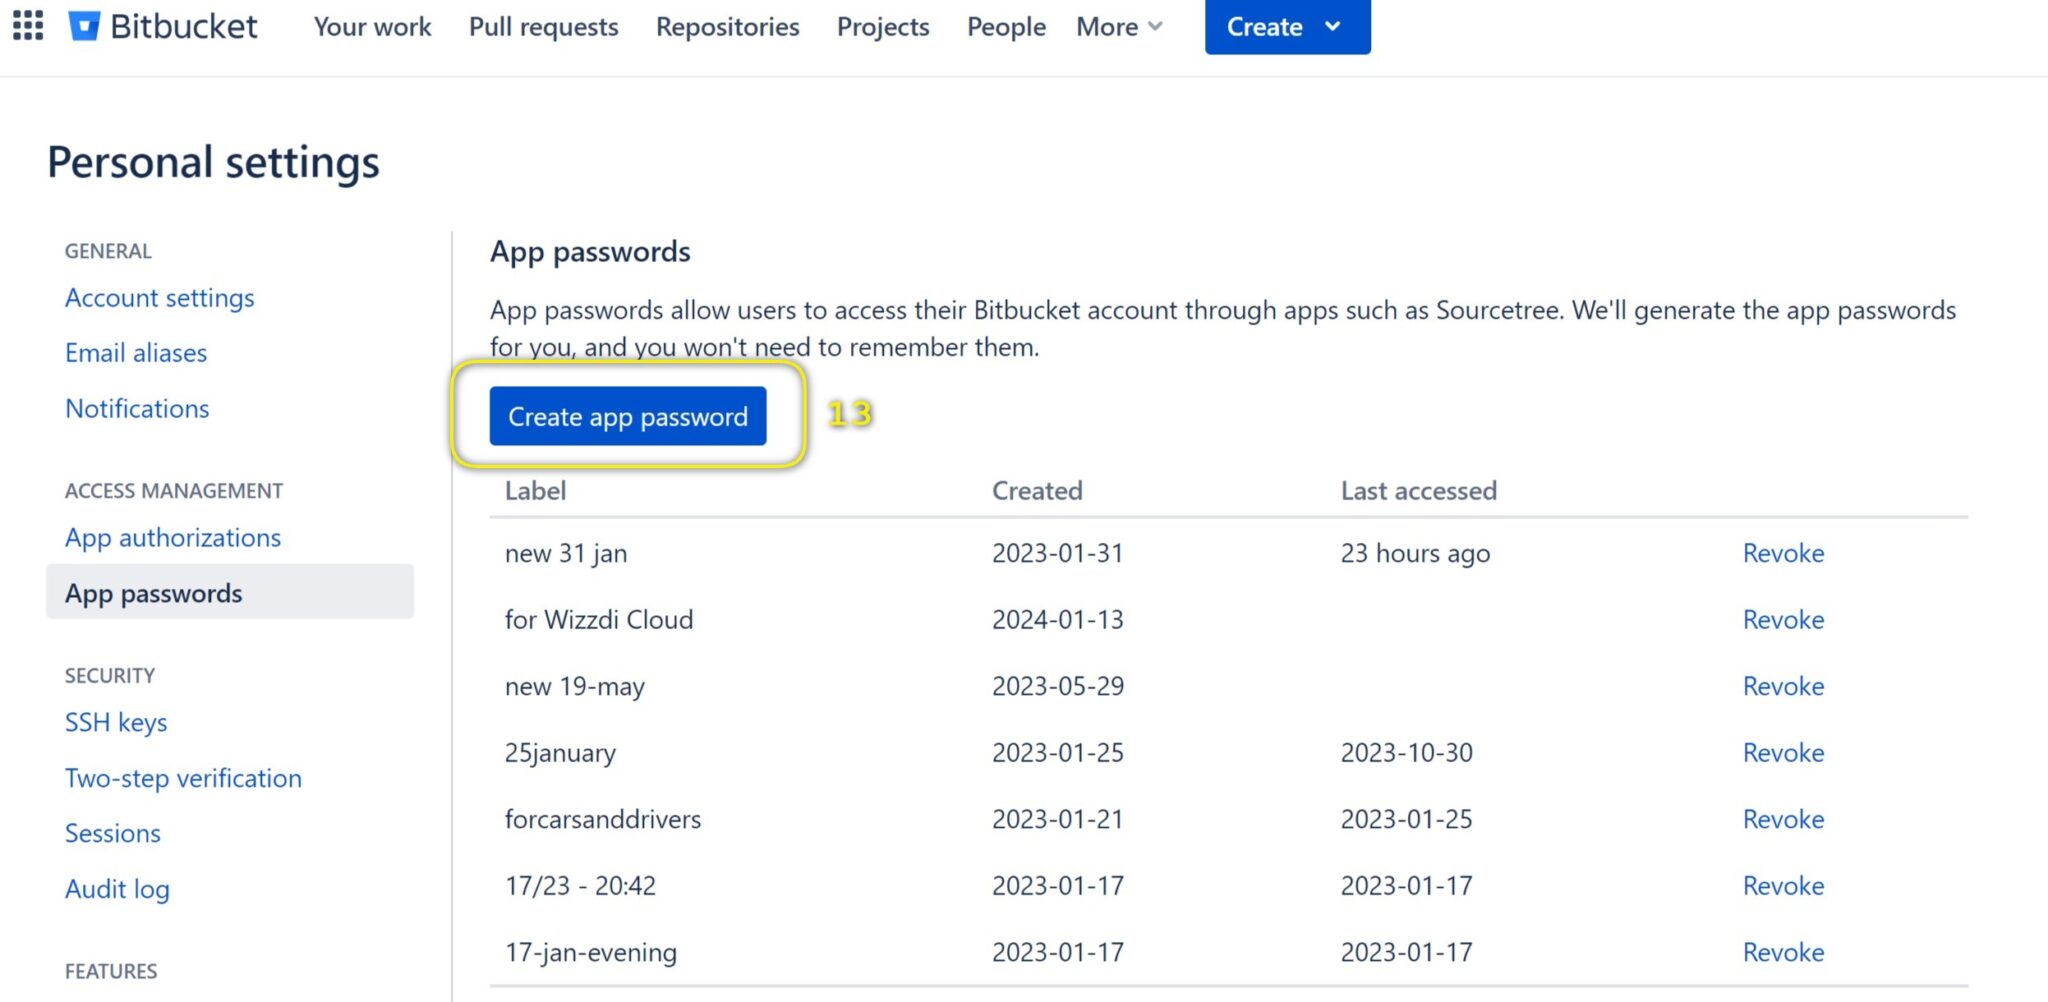
Click on Create app password [13]

Select a label for the new app password [14], then set the access level [15], and click on Create [16].
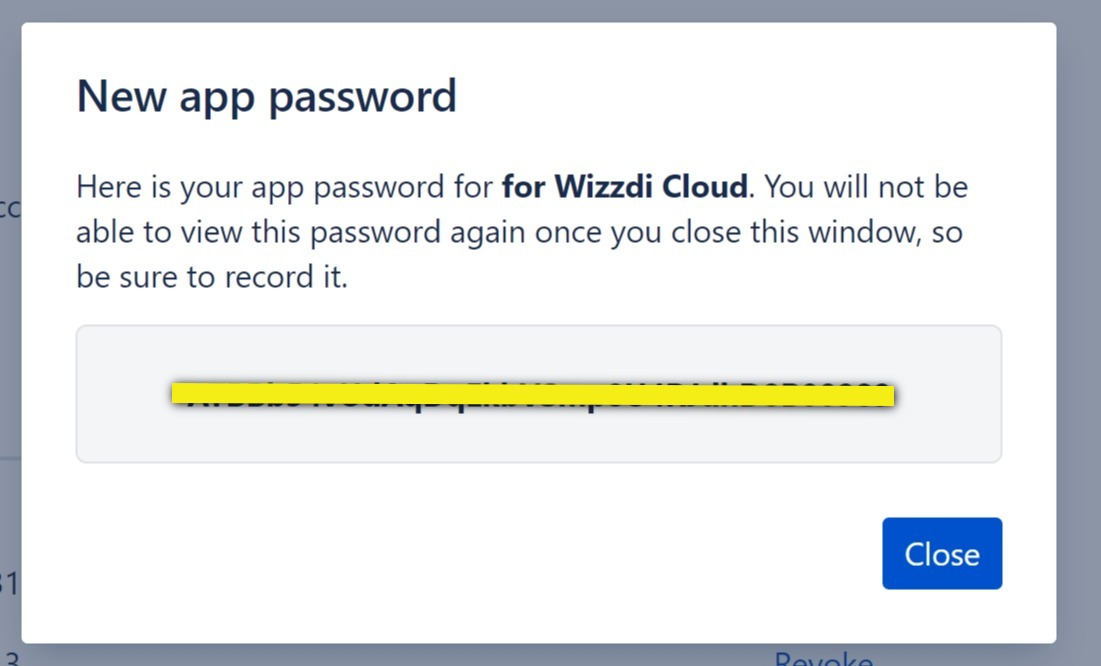
Save the App Password. You cannot retrieve it, but generating a new one is easy.
You can use a single app password for all your Wizzdi Cloud apps.
Bitbucket repositories #
Every Git Repository in Wizzdi Cloud requires a corresponding Repository in Bit Bucket.
At Bit Bucket home, click on the Create button [17]
 Create a Bitbucket repository
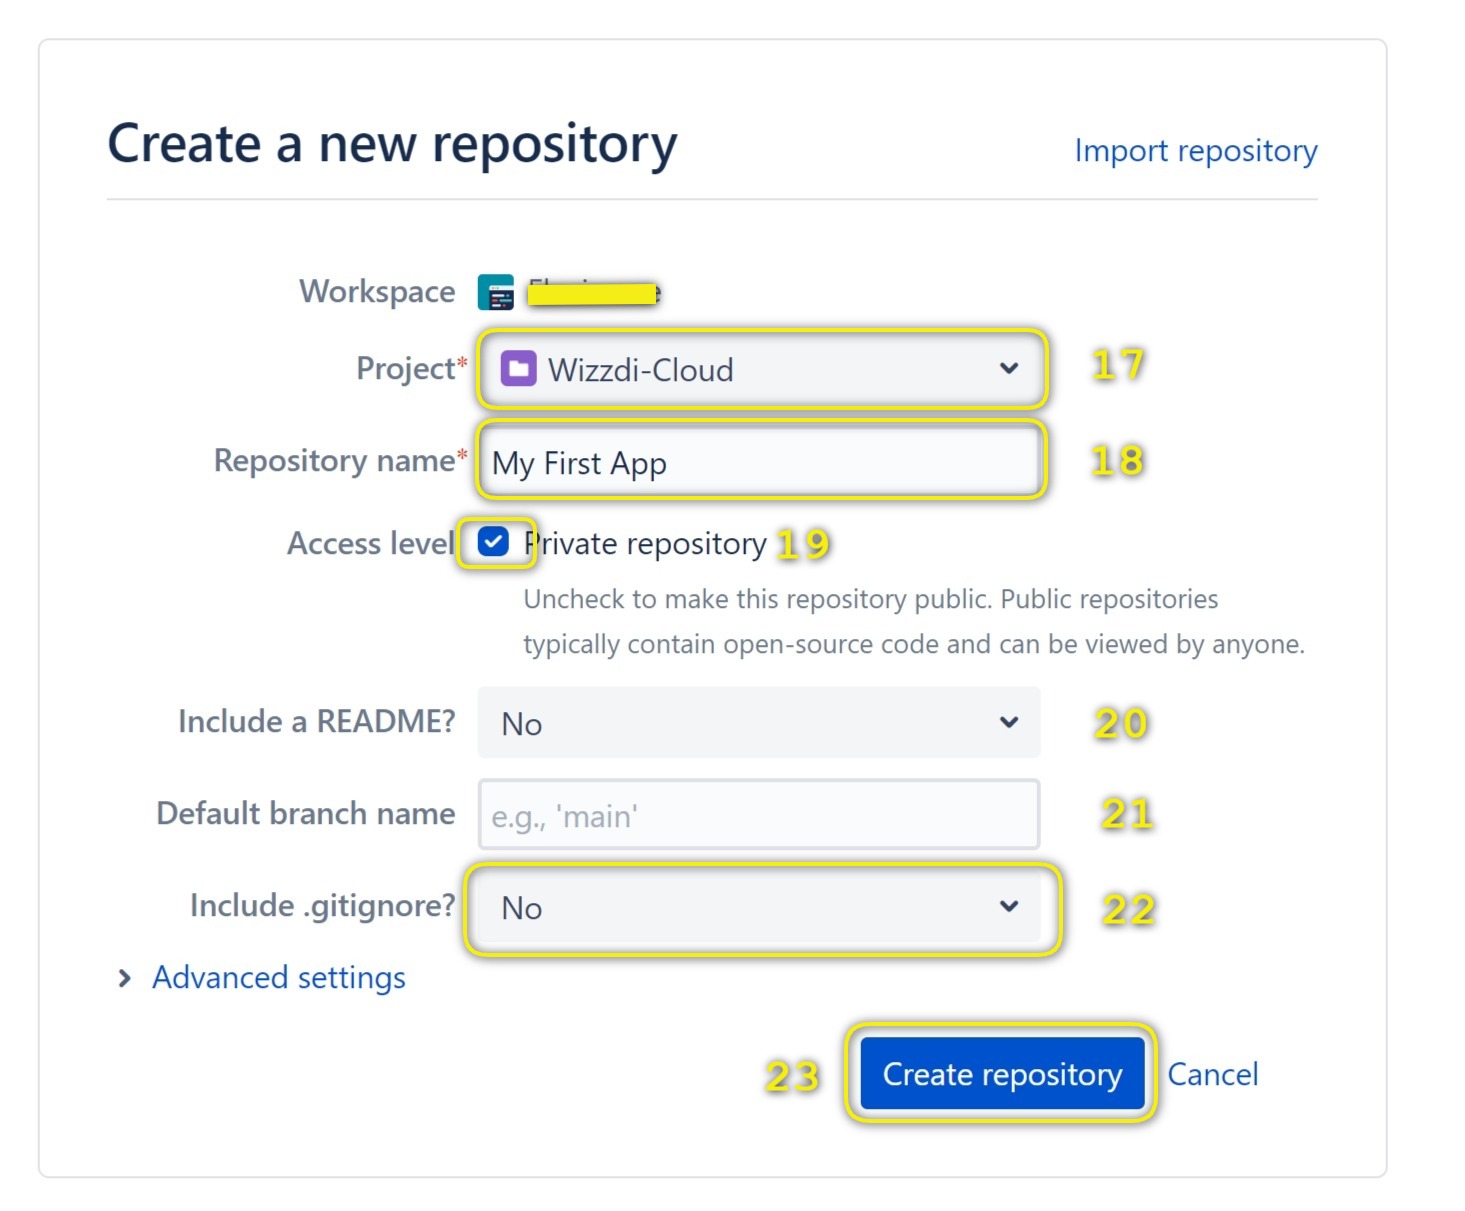
Select a Bitbucket project for the repository [17], name the new repository [18], and set it as private or public [19].
Leave [20] at ‘No’ and [21] empty. Make sure that [22] is set to ‘No’ too.
Once the repository is created, copy the URL. Wizzdi Cloud uses it to connect to the correct repository.

Once a repository is created and its URL is noted, you can connect Wizzdi Cloud with the repository,
Click the Manual Connection checkbox [7] or [9] depending on your GitHub authorization state, authorized [7] or never dealt with [9]; see here.
Manual Connection #
Manual Connection Steps
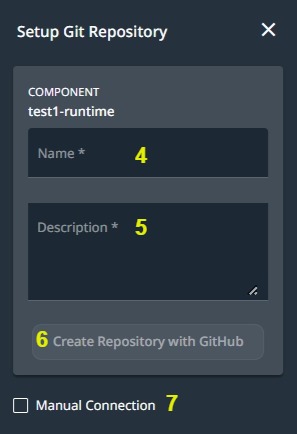
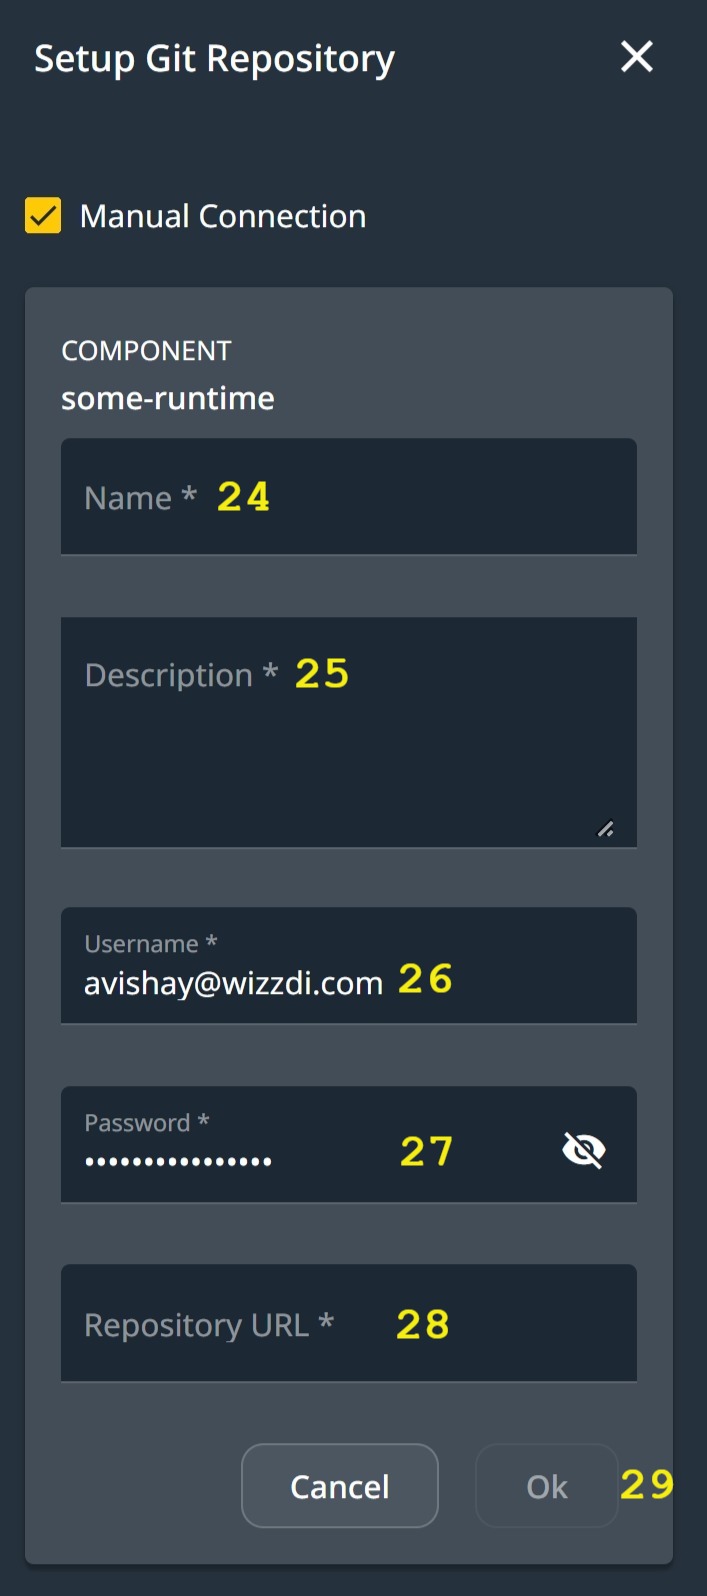
Please provide a name (24) and description (25) for your app’s remote repository. You can choose any name and description you prefer. After that, enter the Bitbucket username (26) and app password (27) that you previously obtained. Next, copy and paste the URL (28) of the repository you created in Bitbucket. Finally, click on the “OK” button (29).
The Bitbucket repository URL should be unique for every Wizzdi Cloud app. However, the username and app password remain identical for all apps.
Note:
If you are creating a new remote repository on Wizzdi Cloud, you may notice that your credentials from Wizzdi Cloud are automatically filled in the remote repository dialog. However, you should replace these credentials with the corresponding service’s credentials, such as Bit Bucket, to ensure your repository is correctly connected.
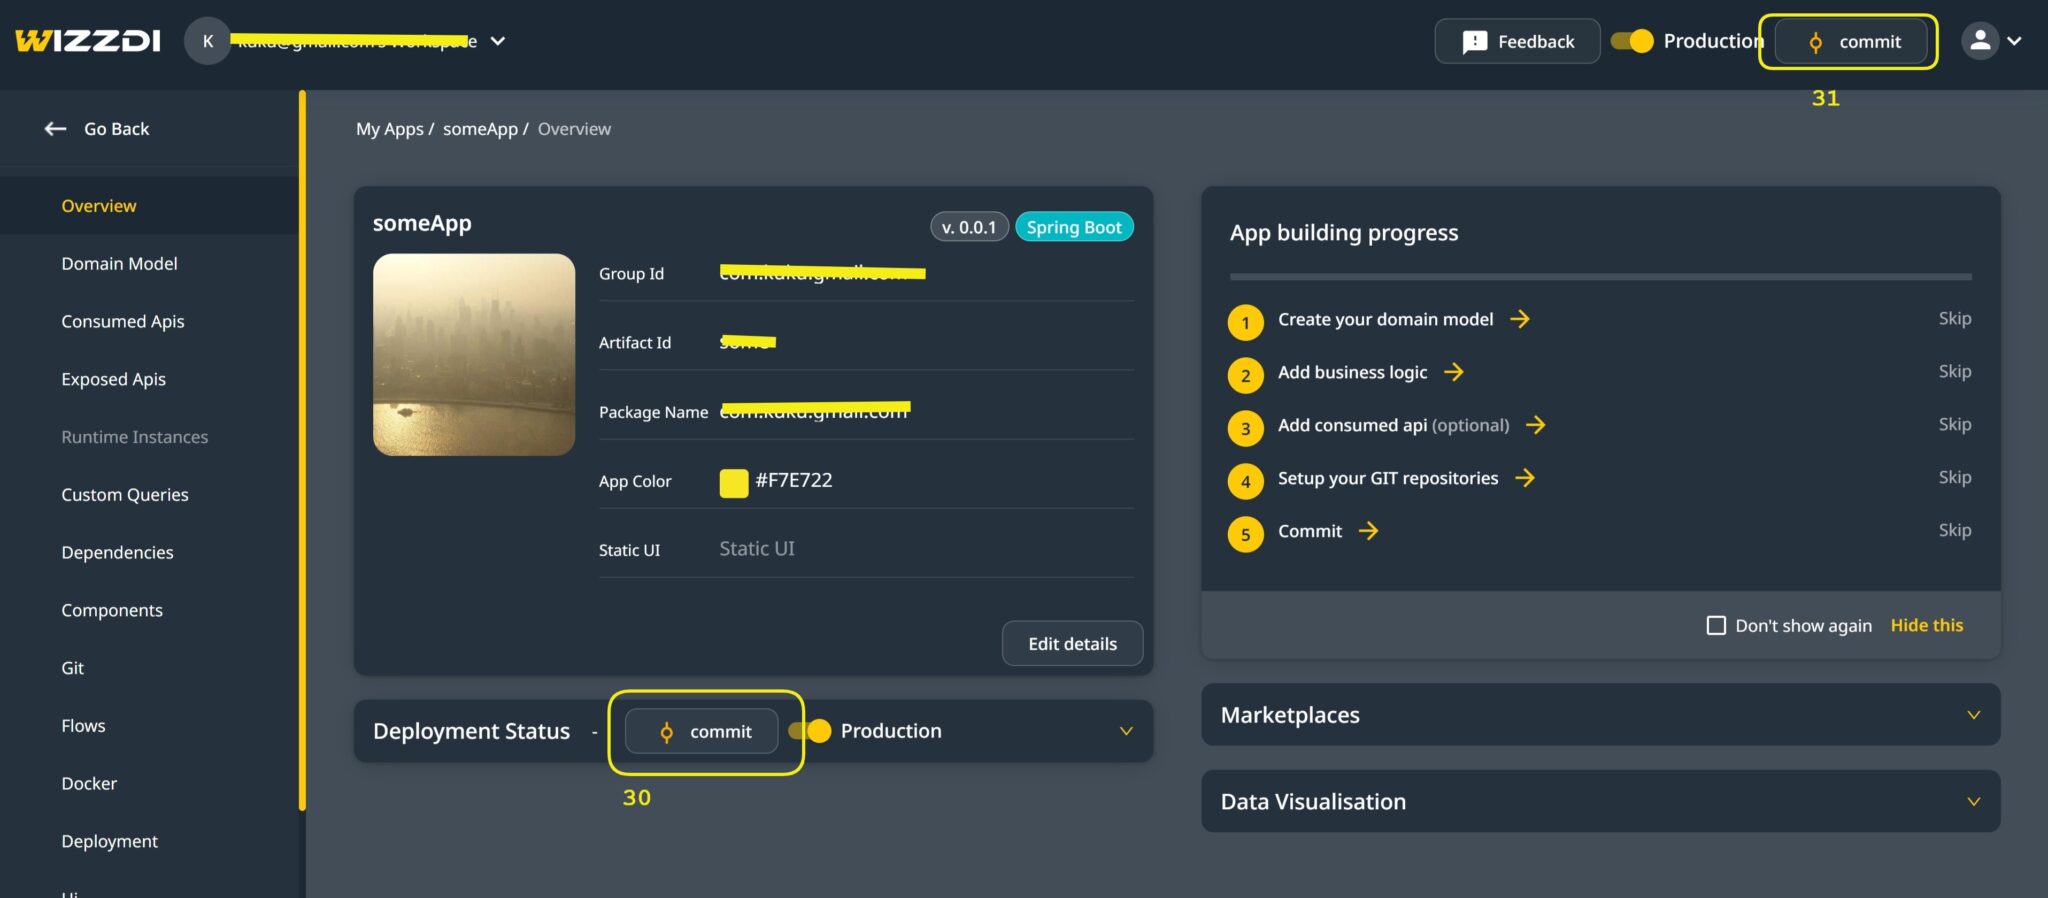
Committing Apps #
Once a remote repository is defined for the App, we need to commit it to the repository. This is required for two main purposes.
Once the Commit dialog appears, fill in the details.
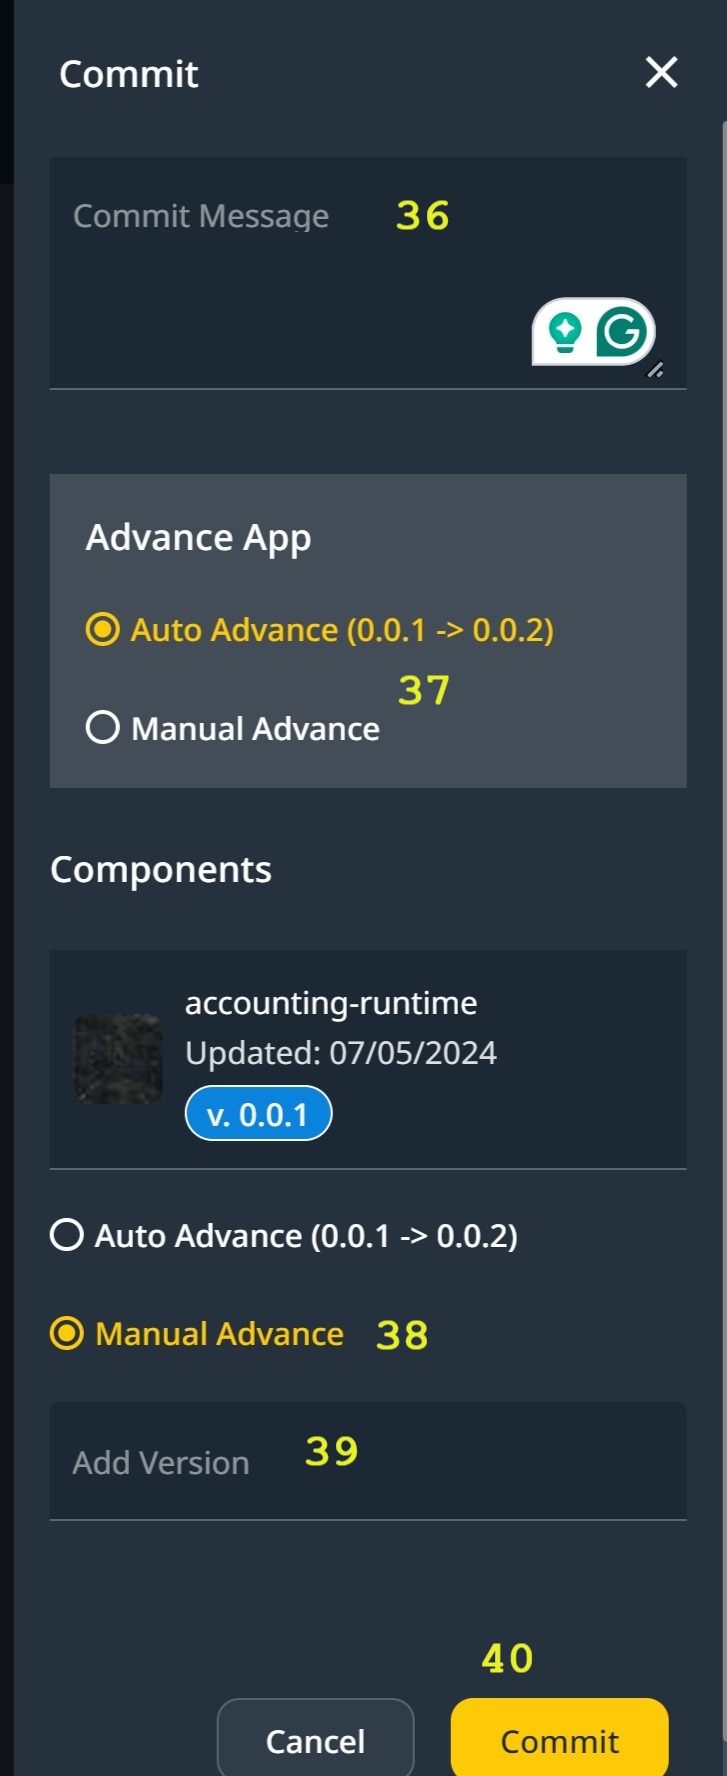
Fill in a commit message [36]. Leave the auto version advance intact; if you change it to a manually [38] set version, it must be in the x.y.z format [39], and you will have to advance it manually from now on. To commit, click on the Commit button [40].
A frozen version is created whenever the app is committed, allowing you to revert to a previous system state at any time. This is done by publishing the past version to a private marketplace and cloning the earlier version of the app into a different workspace.